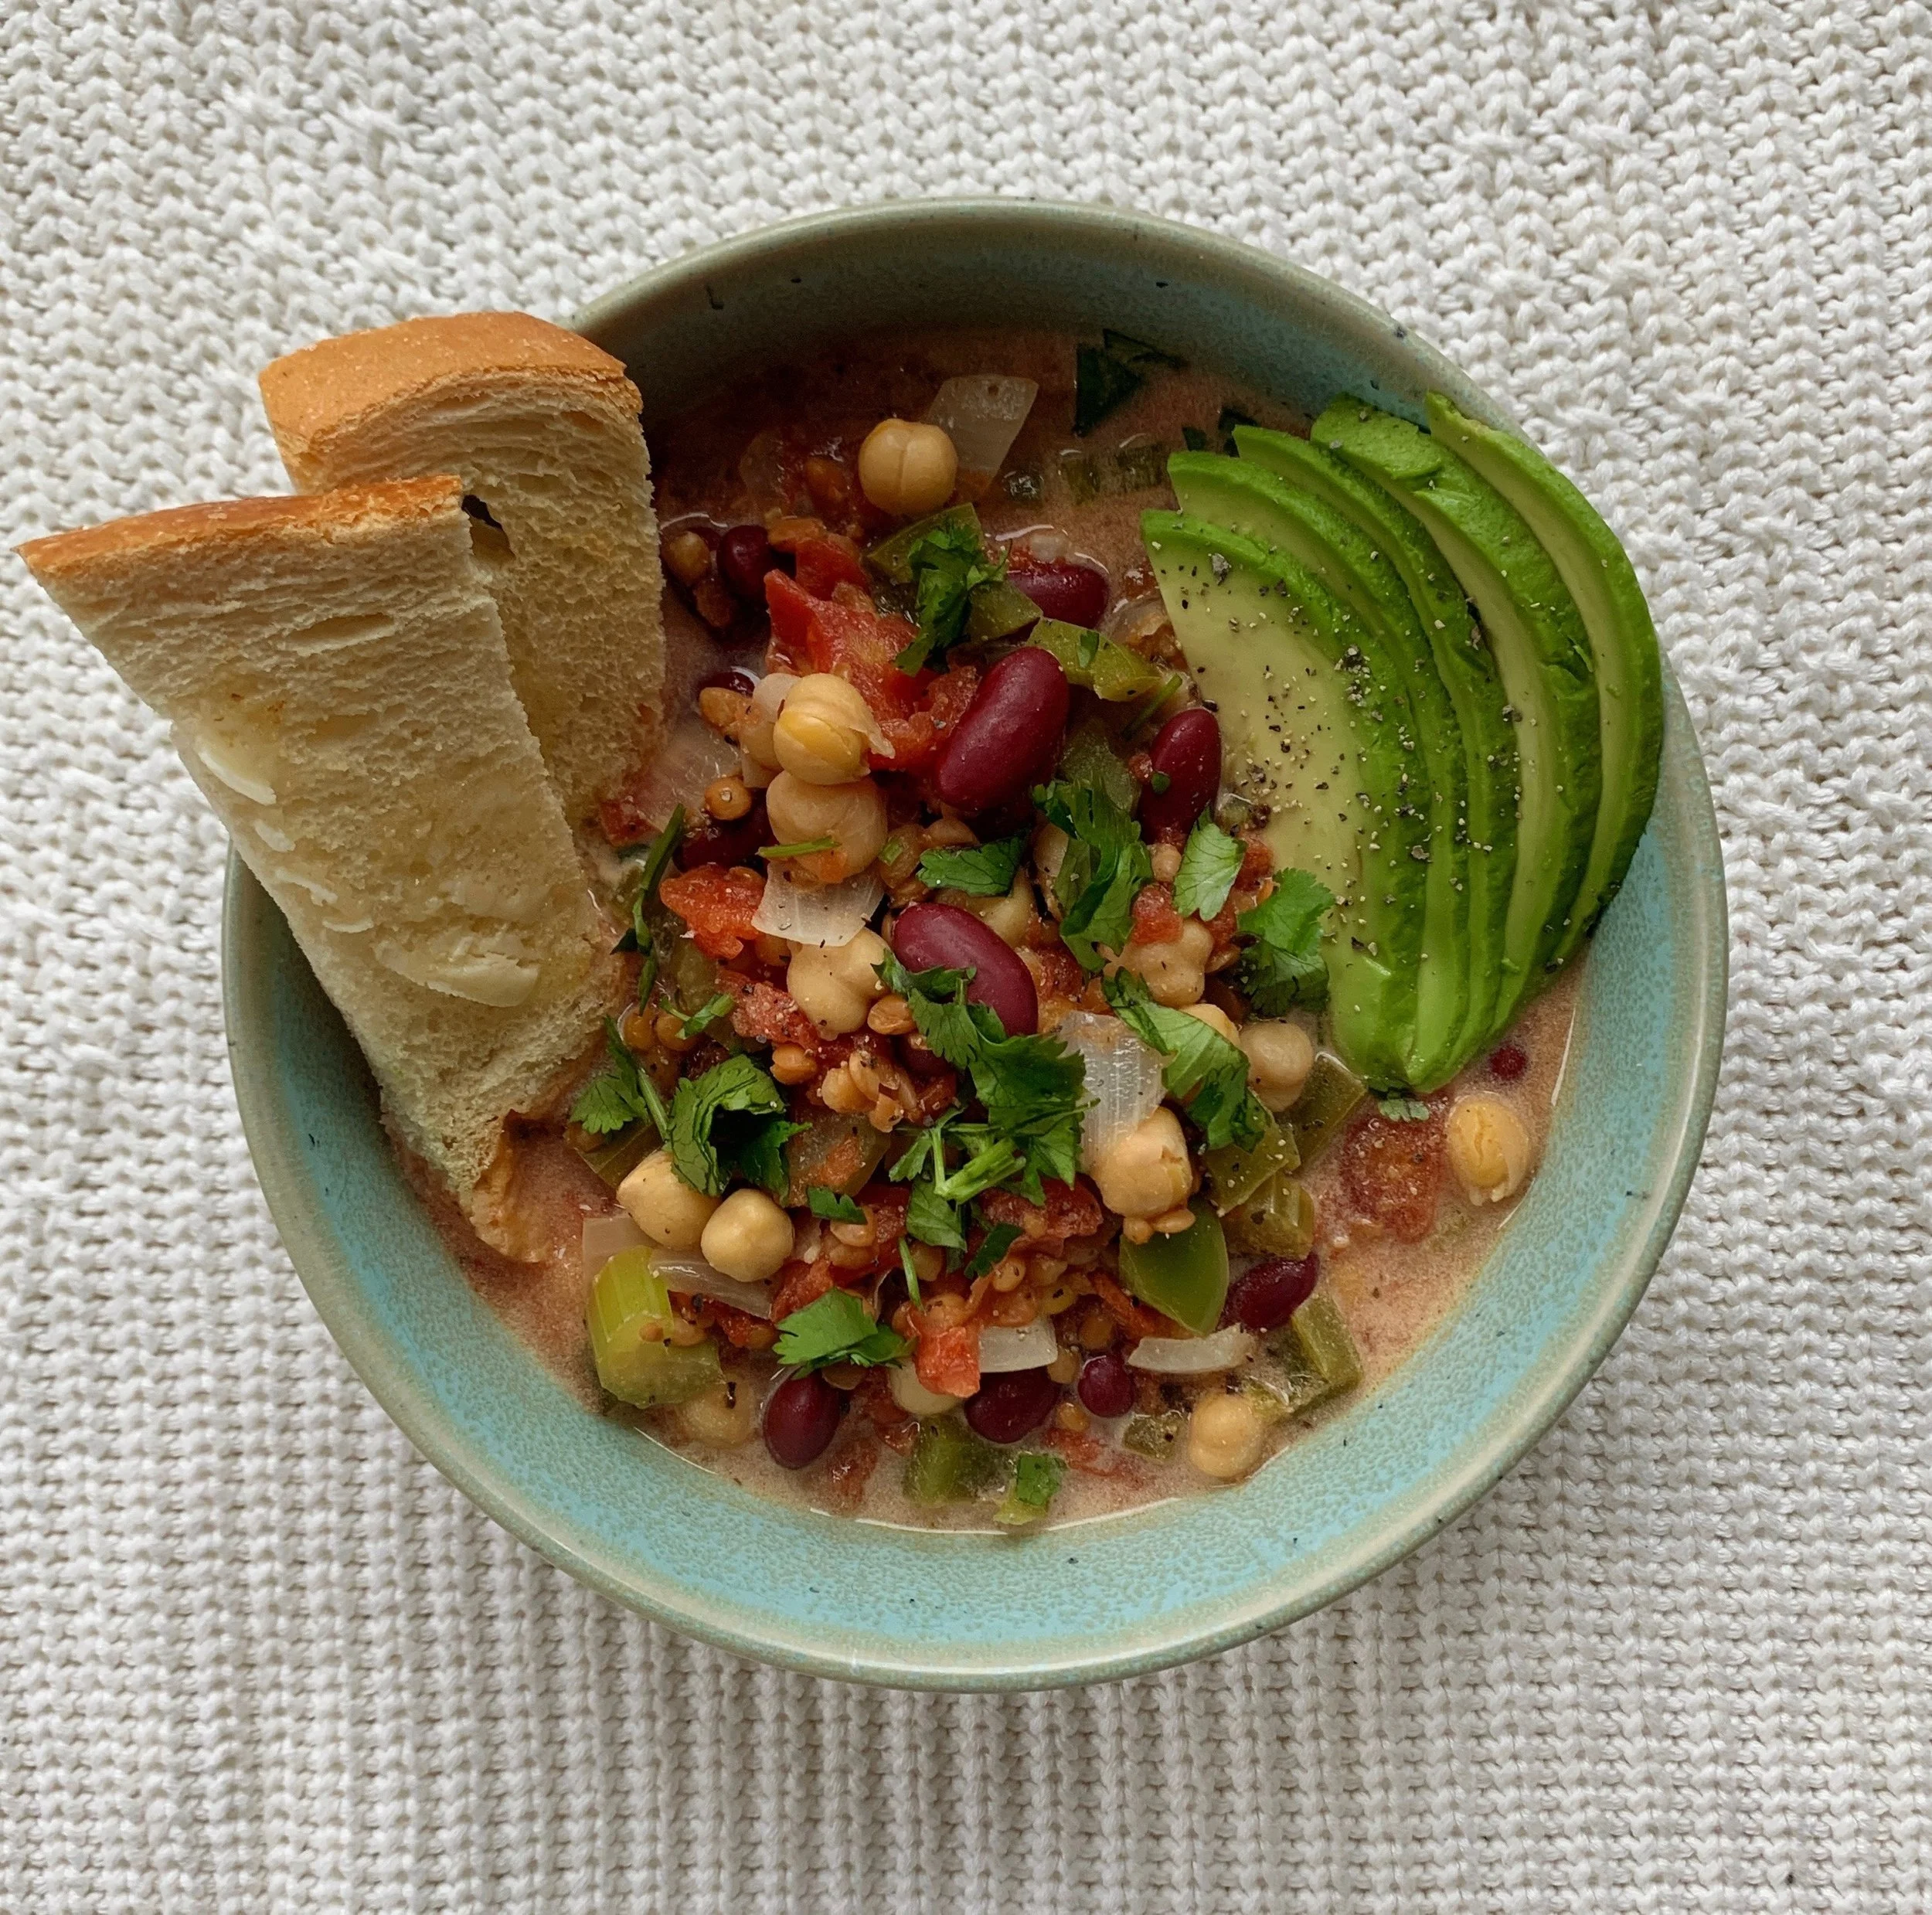
Mediterranean Power Bowl

I love a power bowl, also known as a full-meal salad or Buddha bowl. All food groups in one dish. Each bite a variety of tastes and textures.

For this recipe, Olivia harnessed the classic flavours of the Mediterranean to create a meal that will keep you full for hours. We’re talking chickpeas, cucumber, bell peppers, tomatoes, red onion, feta, and olives.

It’s a flavourful vegetarian dish. And, a very accessible way to incorporate more pulses (lentils, beans, chickpeas) and plant-based meals into your life. Enjoy!

Makes 2 servings

High FODMAP

Mediterranean Bowl Ingredients

1 cup cooked quinoa

½ cucumber

½ tomato

¼ red onion

½ bell pepper

2 tablespoons feta cheese

2 tablespoons chopped Kalamata olives

1-2 tablespoons tzatziki per serving (I used the store-bought)


Ingredients for Dressing

¼ cup balsamic vinegar

¼ cup olive oil

2 tablespoons honey

2 teaspoons Dijon mustard

1 clove crushed garlic

Salt and pepper


Directions for Chickpeas

https://kristenyarker.com/kristen-yarker-dietitian-blog/roasted-chickpeas-4-ways

Half the recipe or make a full batch if you want extra! For seasoning, I used salt and pepper.


Directions for Greek Salad

1. Chop the cucumber, tomato, onion, bell pepper, and olives. Add to a medium bowl

2. Add feta to the bowl

3. In a jar, combine the ingredients for the dressing and shake until combined

4. Pour 1-2 tablespoons over the Greek salad


Directions for Assembly of Mediterranean Bowl

1. Add ½ cup of the cooked quinoa to a serving bowl

2. Add 1 cup of the Greek salad and top with half the chickpeas

3. Add tzatziki and enjoy!

Looking for another power bowl idea? Check out our Caesar Salad Power Bowl.

Recipe and photo credit: Olivia Dodsworth


Caesar Salad

In this recipe we’ve transformed the classic Caesar salad into a full meal. And, we’ve made it vegan. Chickpeas and quinoa not only taste delicious, but add non-blood-sugar-spiking carbohydrates and protein to transform a Caesar salad into a meal that will keep you full for much longer than just some veggies alone. Enjoy!

Serves 2

High FODMAP

Caesar Salad Ingredients

½ can chickpeas (roasted)

2 leaves of kale (off the stem)

4 leaves of Romaine lettuce

1 cup cooked quinoa (cooled)

2 tablespoons capers


Caesar Salad Dressing Ingredients

1/3 cup vegan mayo

1 tablespoon Dijon mustard

½ tablespoon olive oil

1 teaspoon soy sauce

1 teaspoon apple cider vinegar

1 clove of minced garlic

Juice of ¼ of a lemon

Ground pepper to taste

1-2 tablespoons of water, depending on desired thickness


Directions for Chickpeas

https://kristenyarker.com/kristen-yarker-dietitian-blog/roasted-chickpeas-4-ways

Halve the recipe or make a full batch if you want extra! For seasoning, I used salt and pepper.


Directions for Caesar Salad

1. Follow the above chickpea recipe.

2. In a frying pan, heat one tablespoon of olive oil on medium-high heat.

3. Fry the capers until crispy (about 5 mins). Allow to cool.

4. Add the quinoa to a medium-large bowl.

4. Wash and cut the lettuce and kale. Add to the bowl.

5. Add the crispy chickpeas and capers.

6) Add all the dressing ingredients to a jar and shake until mixed.

7. Add around 2 tablespoons of dressing to the salad. Adjust amount to your liking.

8. Toss the salad and enjoy!

Looking for another full meal salad idea? Check out this Tomato, Black Bean, and Corn Salad.

Recipe and photo credit: Olivia Dodsworth

Vegan Chili

vegan chili

In my opinion, everyone should have a great chili recipe in their repertoire. As my Grandmother would say, It’s the perfect cold day “stick to your ribs” food. Chili is also a filling and delicious way to incorporate more plant-based foods and beans/lentils into your eating habits.

This chili, that fantastic dietetic student Olivia has created, takes a twist with coconut milk. Thank you Olivia!

Vegan Chili Ingredients

1 tbsp olive oil

1 white onion (chopped)

3 garlic cloves (minced)

2 stalks celery (chopped)

1 bell pepper (chopped)

½  jalapeno pepper

19 oz can chickpeas

14oz can kidney beans

14 oz can lentils

14oz canned tomatoes

¾ cup coconut milk

1 cup veggie broth

1 tsp cumin

1 tsp dried oregano

1 tsp paprika

cilantro (optional)

avocado (optional)

toast for dipping (optional)


Vegan Chili Directions

  1. Chop the onion, garlic, celery, bell pepper, and jalapeno pepper.

  2. Heat the olive oil in a large saucepan on medium heat.

  3. Add the garlic and onion. Sautee for 5 minutes.

  4. Add the celery, bell pepper, and jalapeno pepper. Sautee for another 5 minutes.

  5. Add the beans, lentils, tomatoes, vegetable broth, and spices. Simmer for at least 30 minutes.

  6. Add the coconut milk and stir.

  7. Optional: Top with cilantro and avocado.

  8. Optional: Serve with a slice of sourdough toast.

  9. Enjoy!

Recipe and photo credit: Olivia Dodsworth.

Vegan "Butter Chicken" (Without the Butter or the Chicken)

This is a warm, comforting dish - perfect for dark, cold nights. Don’t be confused by the recipe’s name. It’s vegan - i.e. there’s no butter, chicken, or cream. In this recipe, we’re using tofu instead of the chicken, olive oil instead of the butter, and cashews instead of the cream. But, butter chicken’s flavour profile is the inspiration for this dish so we wanted to keep the name so you would know what to expect.

FODMAP rating: High FODMAP

Vegan Butter Chicken Ingredients

 ½ cup raw cashews

½ cup vegetable broth

½ cup water

¼ cup tomato paste

1 tbsp olive oil

1-inch fresh ginger

3 garlic cloves

1 medium white onion

1 tsp turmeric powder

½ tsp cumin

1 tsp paprika

1 tsp garam masala

1 tbsp chili flakes (optional)

1 tbsp maple syrup

Salt and pepper to taste

 1 cup raw brown rice

2 cups water

¼ cup cilantro for garnish

 1 block of extra firm tofu (this is crucial to get that chicken texture)

Half head of cauliflower


Vegan Butter Chicken Directions

  1. Soak cashews in warm water for one hour to soften. Blend to form a cashew cream.

  2. Preheat oven to 425 degrees F.

  3. Press the tofu with a paper towel to release the water.

  4. Cut the tofu into bite-size pieces. Toss it in a large bowl with olive oil, salt, and pepper. Place the tofu on a baking sheet.

  5. Wash and cut the cauliflower into bite-size pieces. Toss in a large bowl with olive oil, salt, and pepper. Place on the baking sheet with the tofu and bake for 20-30 minutes, flipping halfway through.

  6. In a small pot, combine 1 cup of brown rice with 2 cups of water. Bring to a boil, then cover and reduce the heat to low until all the water evaporates.

  7. Finely chop the garlic, onion, and ginger.

  8. In a large saucepan or Dutch oven, heat the olive oil on medium heat. Sautee the onion, garlic, and ginger (about 5 minutes). Add the seasonings.

  9. Add the tomato paste, cashew cream, and vegetable broth while stirring constantly to prevent sticking to the bottom of the saucepan (and burning).

  10. Add the roasted tofu and cauliflower. Simmer for 10 minutes then taste, adding more salt and pepper if needed.

  11. Serve over brown rice and garnish with cilantro.

 Enjoy!


Looking for more plant-based recipes? Check out Zucchini and Sundried Tomato Tempeh Pasta.

Recipe and photo credit: Olivia Dodsworth. Thank you Olivia!

NGC*: Meal Planning

nutrition game changer meal planning

When working with women who want to eat better, one of the least popular recommendations that I make is creating a meal plan. When I suggest creating a meal plan, I’m usually met with a response along the lines of:

“I’m already crazy-busy. How am I supposed to add one more thing to my life?!”

I understand this knee-jerk resistance. At first it does seem like making a meal plan is adding more to your already overly full schedule. But, in reality it actually saves time and stress. I grew up watching ‘80s cartoons. One show had a saying that they’d repeat:

“Knowing is half the battle”

This phrase is true when it comes to meal planning. While it does take time to sit down and create a meal plan, doing so will save you hours of stressful time each week. From your meal plan you can prepare a grocery list. Think about how much more time you have if you’re only going to the grocery store once or twice a week (I’ve had lots of clients tell me they end up grocery shopping every day because they don’t have a plan). Think of how much time you’ll save if you have what you need in the fridge to turn tonight’s leftovers into tomorrow’s dinner. You could even do Thursday’s lunch and dinner meal prep on Wednesday while you’re in the kitchen waiting for dinner to cook. Efficiency – what?!

Having a meal plan will also save you money and stress. Imagine no more: • Last-minute trips to the grocery store when you’re hungry. • Staring blankly into your fridge. • Garbage bins full of veggies, bought with the best of intentions, but now gone bad.

While the knee-jerk resistance to meal planning is the time it takes, I suspect that there’s a deeper source to the resistance. For many of us, the only experience that we’ve had with meal plans is when on strict diets. We subconsciously associate meal planning with deprivation, forced structure, and failure. No wonder we don’t want to meal plan. Take a moment to check in with yourself. Does the structure of a meal plan make you feel constrained? If so, let’s take this opportunity to re-frame meal plans. It’s your life. It’s your meal plan. Plan what you want to eat. This is a tool to serve you – not the other way around.

Lastly, and very importantly, it’s your plan – change it whenever you want! Did you plan to make a complicated, new recipe tonight but you had an awful day and all you want to do is order pizza? Order the pizza! Savour the pizza! And, revise your plan so that the ingredients that you bought for that new dish are used up before they go bad.

Not convinced? Give it a try, just for this month. It’s only 4 weeks. Summer is fleeting. If meal planning can save you time, this is the perfect month to try it!

*A Nutrition Game Changer (NGC) is a food or habit that has made a big impact on the nutritional health of clients I’ve worked with. And, in my life too. Some may call these nutrition hacks. But I'm not a fan of that phrase. I share one NGC each month.

Join Me in Trying Something New

bamboo

Today’s post is inspired by my experience with a dietetic intern last week. A little background: to become a dietitian, you get an undergraduate degree in dietetics and do a 1-year internship where you shadow dietitians in the many places that we work. I’m always excited when interns ask if they can spend time with me. I’m happy to share my perspective with them, and I always learn something from them in return. The intern who shadowed me last week is from Saskatchewan. She has only visited the coast briefly before but she wants to move here. So, in addition to sharing my perspective on our profession, I was sharing aspects of our west coast culture with her. Including food.

The fantastic news is that she jumped right in to the experience and tried all sorts of new foods. Foods that I take for granted but were new to her. What did she try? Oysters, candied salmon, tempeh, deep fried pickles, and several dishes at a raw food restaurant. Okay, maybe the deep fried pickles aren’t a part of my repertoire. But the rest are my regular fare.

Her enthusiasm made me look in my own fridge and cupboards. When was the last time that I tried a new food? I honestly can’t remember. Oops, looks like I’ve been stuck in a rut.

Now, it’s your turn. When was the last time that you tried a new food?

Why do I care? Because variety is more than the spice of life. It’s a key to healthy eating. We human beings aren’t pandas – existing solely on bamboo shoots. No single food provides all the vitamins, minerals and other nutrients that we need. We need a wide variety of foods. The wider the better.

This month I’m going to try new things. Maybe new foods. Maybe new dishes whose ingredients are familiar to me. It’s time to get out of my rut.

Are you with me?

P.S. Would you like a little inspiration? Each week on Facebook I do “What’s This Wednesday” where I post a veggie or fruit and start a conversation on favourite ways to prepare/ eat it. I also post a recipe board on Pinterest with all sorts of ideas.

Roasted Chickpeas - 4 Ways

It's official - 2016 is the year of the pulse! Pulses, such as chickpeas, are high in vegan-source protein, high in fibre, low-glyemic carbs, and contain lot of other nutrients. Did you know that we grow lots of them in Canada? Roasted chickpeas are a delicious way to eat more pulses. My friend Margie Barnard, a fantastic cook (we're talking Four Seasons Hotel), and I developed these recipes. We each had our favourites, so I’m sharing all four. The steps are the same for all of them.

Whole chickpeas are a choking hazard for little ones, so this is a good snack idea for kids 3 years and up (and us kids at heart).

Roasted Chickpeas Directions

  1. Drain and rinse the chickpeas.

  2. Pat dry the chickpeas until well dried (otherwise they’ll be mushy).

  3. Combine all the other ingredients in a medium-size bowl.

  4. Toss the chickpeas into the mixture. Coating the chickpeas well.

  5. Line a cookie sheet with parchment paper. Spread the coated chickpeas onto the parchment paper-lined sheet.

  6. We played around with the oven temperatures while they were cooking so I’m afraid that I don’t have exact temperatures and times for you. We started at 400 degrees for the first while, then stirred the chickpeas and reduced the oven temperature to 350 degrees. Keep a close eye on them while they bake. You’re looking for them to turn a golden brown colour. And, when you taste them, they have a crunchy shell and are soft in the middle. The recipes containing honey turned the darkest colour, the fastest.

  7. Allow to cool, then ENJOY!

Savoury Roasted Chickpeas

15oz can chickpeas

1/2 tsp garlic powder

1/2 tsp ground cumin

1/4 tsp salt

1/4 tsp pepper

2 Tbsp olive oil

Garam Masala Roasted Chickpeas

15oz can chickpeas

1 tsp garam masala

1/4 tsp salt

2 Tbsp olive oil

Honey Roasted Chickpeas

15oz can chickpeas

2 Tbsp honey

1 tsp sugar

1 tsp cinnamon

Sweet & Salty Roasted Chickpeas

15oz can chickpeas

2 Tbsp honey

1 tsp canola oil

1/4 tsp salt

See more healthy, delicious recipes.

Another Reason to Plan Your Meals

Another Reason to Plan Your Meals

It’s been unavoidable this past week. Every newscast seems to be talking about how the low Canadian dollar is going to mean increasing food costs. Ugh. Not exactly the news that we want to hear after the expensive holiday season. But, in looking for the silver lining, I’m choosing to see this as one more reason for you to plan your meals. Why? Because when you plan your meals and shop for the food that you’ll need to make those meals, you end up wasting less food. Less food in the garbage means more money in your pocket. Period.

Not convinced yet? When I suggest creating a meal plan, often people respond something like:

I’m already crazy-busy. How am I supposed to add one more thing to my life?!”

I agree that at first it seems like making a meal plan is adding more to your already overly full schedule.

But, in reality it actually saves time and stress.

A good portion of the stress of making dinner each night is figuring out what the heck you’ll make. Many parents admit that this thought (and it’s stress/ worry/ fear) starts creeping into their minds at about 4pm.

Not having a plan leaves you multi-tasking to come up with some idea while you’re finishing up your work day, rushing to pick the kids up from daycare, and fighting the traffic to get home and/or to extra-curricular activities. Not having a plan likely means creating an extra task of running in to the grocery store, with kids in tow, when the store is at it’s busiest. Not fun.

While it does take time to sit down and create a meal plan, doing so will save you hours of stress each week.

Does the structure of a meal plan make you feel constrained? Remember that it’s your plan – change it whenever you want! Did you plan to make a complicated, new recipe tonight but you had an awful day and all you want to do is order pizza? Order the pizza! And revise your plan so that the ingredients that you bought for that new dish are used up before they go bad.

Not convinced? Give it a try, just for this month. What do you have to lose?

Nutrition Game Changer: Cook The Night Before

cook-the-night-before

Last month I introduced the concept of nutrition game changers. Nutrition game changers are foods or simple habits that can make a big impact in your health. Some might use the term ‘nutrition hacks’. Today, I had planned to share with you a different habit. But I noticed that, with the nights cooling off again, I’ve been using this habit again. I do it a lot myself. And, it’s helped a number of clients too. I realized that this one simple habit can have a big impact on your health because it makes it easy to eat a lot of healthy foods that you might not otherwise eat. So, what’s this simple habit? Cook the night before.

Cook the Night Before

It’s a nutrition game changer for two huge reasons:

  1. It lessens the stress of getting dinner on the table.
  2. It makes it possible to eat healthy foods like whole grains, beans cooked from scratch, and longer-cooking veggies.

I’ve heard it called the witching hour. You know, that window of time between finishing work, commuting through traffic, picking the kids up from daycare, and making (and eating) dinner. For many people, it’s the most stressful time of the day. No one I know has an hour (or more) to cook dinner. Most people have somewhere from 20 – 30 minutes. Our modern lives have squished this time so much that it’s no wonder that take-out, drive-throughs, and pre-prepared food sales are through the roof. They’re survival techniques. You always ask me for help to get from survival to thriving. Cooking the night before can be a huge help.

No, I’m not talking about spending hours in the kitchen in the middle of the night! I’m talking about multi-tasking. You are likely home for several hours in the evening, after dinner but before you go to bed. Use this time to cook.

There are lots of healthy foods that take almost no work, but they take a long time to cook. Take a few minutes for prep, get the food cooking, set a timer, and then set off with your other evening activities. I personally do the prep while I’m already in the kitchen cooking my dinner for this evening. I don’t have kids so that works. If doing anything else besides preparing tonight’s dinner will take you over the edge, then do the prep later.

When the food is cooked, simply allow them to cool at room temperature and then store them in the fridge. They’ll store for several days in the fridge. On the day that you want to eat them for dinner, simply re-heat them in the microwave or steam them. (Place at least 1 inch of water in the bottom of a double boiler. Bring to a boil over high heat. Place your food in a bowl inside the double boiler. Steam until heated).

What Healthy Foods Can You Cook the Night Before?

  • Whole grains. E.g. pot barley, brown rice, wild rice, farro. They all take 45 – 60 minutes to cook. But the prep is easy. Just add them to a pot with water, bring to a boil, reduce the heat to simmer, set your timer and you’re done.
  • Winter squash. E.g. spaghetti squash, butternut, acorn squash. Preheat the oven to 425 degrees F. For all but spaghetti, cut the squash in half lengthways, scoop out the seeds. Pour a splash of water in the seed cavity. Place in a baking dish. Cover with tin foil. Bake for 45min-1 hour (until the flesh is soft when you test it with a fork). For spaghetti squash: leave the squash whole, pierce all over with a fork. Cover with tin foil. Bake for 1 hour or longer (until the squash gives easily to your touch).
  • Root veggies. E.g. beets, yams. There are lots of ways to bake these veggies. Techniques vary by veggie. But unless you take a long time to prep them by cutting them into small pieces, they’re going to take 45min – 1 hour to bake. Here’s one minimal prep time technique each for beets and yams: Preheat the oven to 425 degrees F. Wash but don’t peel the beets. Remove any stems or skinny roots. Rub with olive oil. Wrap in tin foil and place in a baking dish. Roast until soft to the touch. The time will vary based on the size of your beets. Yams can be cooked at the same temperature. Wash but don’t peel the yams. Pierce all over with a fork. Wrap in tin foil. Bake for 45min- 1 hour.
  • Dried beans. Cooking beans from dry is not only cheaper, but it avoids the exposure to BPA in the liner of most cans. Beans take 2 simple prep steps – one the morning before and one the night before. In the morning, measure out your beans, place in a bowl, cover with water (at least 1 inch above the beans), and sit at room temperature all day. At night, drain the beans,  place them in a large pot, add fresh water to cover at least 1 inch above the beans, bring to a boil, reduce the heat to simmer, set your timer and you’re done.

Extra Tip: All of these foods make fantastic whole-meal salad ingredients. Cook extra the night before and enjoy them both (cold) as a whole meal salad for your lunch and warm as a part of dinner.

Looking for new recipe ideas? Find lots of great healthy recipes here.

Baked Avocado Eggs

Baked avocado egg

I'm a long-time lover of avocados and so I'm excited to see that many others have realized how delicious they are. And, that their healthy fat is not something of which to be afraid. Browsing around Pinterest for some cooking inspiration (I love Pinterest), I found this recipe. I like to give credit where credit is due, so here's the original recipe: http://www.popsugar.com/fitness/Baked-Eggs-Avocado-Recipe-30787252 This baked avocado egg recipe has all the creamy deliciousness of an eggs benny - without all the work of Hollandaise sauce. In other words, it's a perfect recipe for Easter breakfast. Finger Food Version: Cook a few minutes longer until both the whites and yolk are set (it's recommended that babies under 12 months don't have runny egg yolks). Cut the egg and avocado into finger-food size pieces. Or, spread on long, skinny pieces of toast.

Baked Avocado Egg Ingredients:

1 avocado

2 eggs

salt & pepper

Optional: toast

Baked Avocado Egg Directions:

  1. Preheat the oven to 425 degrees.
  2. Slice the avocados in half. Remove the pit. Scoop out enough flesh from the avocado,  so the egg will fit in the centre. Reserve this flesh for another recipe/snack.
  3. Slice a small piece off the back of the avocado halves so that they will sit flat without rolling around. Place the avocados in a small baking dish, making sure they fit tightly. If your dish is too big, scrunch up a piece of tin foil to fill the space.
  4. Season the avocado halves with salt and pepper. Crack an egg into each avocado half.
  5. Place in the oven and bake for 15 to 20 minutes. Cooking time will depend on the size of your eggs and avocados. And, how you like our eggs cooked.
  6. Enjoy scooped directly out of the avocados. Or, spread on top of toast.

Check out more healthy, delicious recipes here.

Make Weekday Evenings Easier: A (Not So) Secret Way

If you’re like most of the Moms and Dads whom I’ve worked with over the years, then you find the dinner-bath-bedtime routine of weekday evenings to be a stressful, rushed time. One way to make these evenings easier is to plan your meals. When I suggest creating a meal plan, often people respond something like:

I’m already crazy-busy. How am I supposed to add one more thing to my life?!”

I agree that at first it seems like making a meal plan is adding more to your already overly full schedule.

But, in reality it actually saves time and stress.

I grew up watching ‘80s cartoons. One show had a saying that they’d repeat:

Knowing is half the battle

This phrase is true when it comes to meal planning.

Long gone are the days before you had kids when you could leisurely stop in to the market to wander the aisles and decide what you feel like eating tonight. Then taking your time cooking dinner. Or, perhaps you were more likely to eat out most nights – catching up with your partner and/or friends over an hour-long (or longer) meal.

A good portion of the stress of making dinner each night is figuring out what the heck you’ll make. Many parents admit that this thought (and it’s stress/ worry/ fear) starts creeping into their minds at about 4pm.

Not having a plan leaves you multi-tasking to come up with some idea while you’re finishing up your work day, rushing to pick the kids up from daycare, and fighting the traffic to get home and/or to extra-curricular activities.

Not having a plan likely means creating an extra task of running in to the grocery store, with kids in tow, when the store is at it’s busiest. Not fun.

While it does take time to sit down and create a meal plan, doing so will save you hours of stress each week.

It’ll also save you time and money. Imagine no more:

  • Last-minute trips to the grocery store.
  • Staring blankly into your fridge.
  • Garbage bins full of veggies, bought with the best of intentions, but now gone bad.

Does the structure of a meal plan make you feel constrained? Remember that it’s your plan – change it whenever you want! Did you plan to make a complicated, new recipe tonight but you had an awful day and all you want to do is order pizza? Order the pizza! And revise your plan so that the ingredients that you bought for that new dish are used up before they go bad.

Not convinced? Give it a try, just for this month. It’s only 4 weeks. December is an extra busy month, if meal planning can save you time, this is the perfect month to try it!

I’d love to hear how meal planning is going for you – the good and the bad! Share your experience in the Comments section below…

Healthy Home-Made Ice-Pops for Kids

Healthy Home-Made Ice-Pops

Recently my friends and I were having a nostalgic laugh about the rising trend of home-made ice pops – also known as paletas. The dietitian in me loves that parents are choosing to make tasty snacks for their kids that beat the heat that include real fruits (even veggies) instead of frozen, colored, sugar water. What made my friends and I giggle was remembering how we too had homemade ice pops when we were kids. However, we were raised in the suburbs in the early 80’s. Our ice pops consisted of frozen OJ concentrate, re-constituted with water, and then frozen again in the ice-pop molds. Not exactly gourmet!

Now pint-sized foodies are enjoying paletas (even the new name is fancy) made with on-trend, healthy ingredients like coconut, avocado, Greek yogurt, almond milk, even kale. And, while we were absorbing all sorts of plastic by-products, you can now buy BPA-free plastic molds and stainless steel molds. It’s amazing how far we’ve come!

Interested in making some yourself? A Google or Pinterest browse will supply you with a summer full of healthy frozen kids snack ideas. Here are two ideas to get you started. For the recipes, all the steps are the same:

  1. Combine ingredients in a blender.
  2. Blend until smooth.
  3. Pour into the paleta molds.
  4. Freeze.
  5. ENJOY!

Blueberry-Kale Home-Made Ice Pops

You really need to blend this recipe well, otherwise the kale pieces are quite big which I found unpleasant (and I love kale). The kale is never truly hidden in these, but when well-blended, it’s an enjoyable part of their texture.

1 cup frozen blueberries 1 cup kale leaves, stems removed (ideally baby kale leaves) 2 cups coconut water

Raspberry-Almond-Coconut Home-Made Ice Pops

A luscious, dairy-free recipe!

1.5 cups almond milk 1/2 cup coconut milk 1 cup fresh or frozen raspberries 2 teaspoons honey pinch of salt

Combine your favorite fruits with other healthy ingredients for a delicious and refreshing summertime paleta treat!

Get more home-made ice pop recipes here.

Why it Hurts so Much when Your Child Refuses to Eat

child refuses to eat{Guest post for Modern Mama} Why does it hurt so much when your child refuses to eat? Several reasons. You don’t have to be dietitian like me to be inundated with nutrition information. Every day we hear about how important it is to get enough of this vitamin and that mineral. We hear about the next super food. And, we hear about the latest food to avoid. When you become a parent this news comes at an even more rapid pace, because now you’re not just responsible for feeding yourself but you’re responsible for feeding your children too. But food is so much more than just fuel for our bodies.

Food is an expression of culture.

Each culture identifies themselves with what they do and don’t eat. Have you ever experienced culture shock when travelling? I bet you craved a food from home. Expats do too. For example, a (Canadian) friend of mine searched out and paid an exorbitant price for peanut butter when living overseas for 5 years – and she was living in Paris where there certainly isn’t a shortage of delicious food! Now that she’s back in Canada she spends her time searching for a decent croissant – go figure!

Food is also an expression of love.

I know that my Grannie’s applesauce was the best that I’ve ever tasted because hers had the extra ingredient of her love. I bet that you have similar memories. Each culture around the world shares food with family and friends. In fact, in most cultures it’s considered rude not to offer food and drink to a visitor to your home.

So it’s no wonder that it hurts so much when your child refuses to eat something that you’ve prepared. All of these layers of meaning come into play. You worry that they won’t get the nutrition that they need. You feel that they’ve rejected your love. And if it’s a cultural food, you feel that they’re rejecting not just you but your culture too.

Ouch!

When your child is a picky eater and he/she is constantly rejecting food these painful experiences can easily compound into guilt and shame. I’m a long-time fan of Brené Brown’s work. She describes so clearly how powerful shame can be. And how huge of a barrier it can be to creating positive change.

There are many reasons that contribute to a child not wanting to eat a particular food, and/or being a picky eater. Most of which have nothing related to rejection of you, your love, or your culture.

When your little refuses to eat a dish, acknowledge your feelings, recognize why it elicits such a strong reaction in you, and choose to take the high road and not engage in a battle. It’s not easy to do, but the right thing often isn’t the easy choice.


Click here to get tips on how to get your child to eat sent directly to your inbox.

More Super Smoothies (for Picky Eater Kids)!

smoothies picky eater kids It happened again yesterday. I was leading a workshop and a parent asked me: “Is it wrong to give my child smoothies with veggies in them? Is this considered hiding veggies?” Rarely a workshop goes by without a parent asking me about smoothies for their picky eater kids. They’re such a popular trend these days. While I touched on this in last week’s blog post; it’s such a common question that I get about healthy snacks for kids that I thought that it was worthwhile to expand on it today. And, share some ideas for smoothie ingredients.

I think that smoothies are a great way to provide vegetables, fruit, protein, and healthy fats for kids. BUT there are a couple of key points to follow to be using them to role model healthy eating and support your child to try new foods on their own:

  1. Don’t lie about the ingredients. This is when you start veering into the “hiding” territory. If you’re waking up at 2am to puree foods so that your child doesn’t know that they’re in a smoothie, then you’ve strayed in the wrong direction. This doesn’t mean that you have to read out to your child a list every last ingredient in a smoothie. But don’t deny a food’s existence. Having your child help make the smoothie (like I suggested last week) is a great way for them to know what’s in it.
  2. Continue to serve “obvious” vegetables (and eat them yourself). Yes, even if your child doesn’t eat them, you’re role modeling choosing to eat vegetables. You’re teaching an important life lesson that I promise is sinking in (even if the vegetables aren’t getting eaten currently).

As I mentioned above, smoothies are a great way to provide vegetables, fruit, protein and healthy fats in a way that many picky eaters will actually eat. Here are some ingredient ideas. Note that some of the ingredients (e.g. nuts) require a higher-powered blender. Mix and match the ingredients to find combinations that you love. And don’t’ be afraid to experiment to find new favs. My new favourite is pistachio-mint-banana, which I was introduced to while on vacation in California last month!

Smoothie Ingredients - Vegetables:

  • Spinach
  • Kale
  • Avocado (also helps a smoothie be creamy)
  • Carrot (I find carrot that’s already grated to blend better than larger pieces)

Smoothie Ingredients - Fruit (choose fresh or frozen fruit instead of juice):

  • Banana (also helps a smoothie be creamy)
  • Berries of any kind
  • Peaches
  • Mango
  • Pineapple
  • Orange
  • Kiwi

Smoothie Ingredients - Protein:

  • Yogurt
  • Cashews (or cashew butter)
  • Ground almonds (or almond butter)
  • Peanut butter
  • Pistachios
  • Pumpkin seeds (or pumpkin seed butter)
  • Hemp hearts

Smoothie Ingredients - Healthy Fats:

  • See all the nut and seed ideas above (including hemp hearts)
  • Avocado
  • Flax oil (or ground flax seeds)
  • Hemp oil
  • Fish oil
  • Vitamin D drops

Other tasty ingredients (that pack more of a taste punch than a nutritional punch):

  • Dates
  • Mint
  • Cocoa powder

Looking for more ideas? Check out the recipe for my Sunshine Smoothie (Orange-Pineapple-Fresh Turmeric) or these green smoothies.

A Super Way to Introduce Kids to the Kitchen: Smoothies

smoothies You’ve probably heard that it’s great to get your kids to help you in the kitchen to learn cooking skills, instill healthy eating habits, and more.


When I’m talking with moms and dads they often tell me one of two things about this:

  1. It sounds like a great idea. But they just can’t imagine how to make it happen when they think about the amount of work and the mess.
  2. Yes, they bake with their kids sometimes.


This is another great example of us health folks meaning one thing and parents hearing another.


Now don’t get defensive or let your mommy guilt kick in. I’m taking ownership of the miscommunication happening here.


When I mean “cook with your kids” I mean “get your kids involved in making healthy foods”.


I’m not against baking with kids. It’s fun too. Just don’t limit yourself to baking.


Invite your kids into the kitchen to help with simple, everyday tasks.


Choose one simple task for them to help with. Examples include:

  • Washing veggies
  • Measure out the dry quinoa/ rice and water
  • Spinning and tearing up the lettuce for a salad
  • Setting the table
  • Placing dirty dishes in the dishwasher
  • Smoothies


Smoothies are also a fantastic way to get kids in the kitchen:

  •  They’re something that they can make from start to finish.
  • They’re quick and relatively mess-free.
  • They include healthy ingredients.
  • I’ve never met a child who doesn’t LOVE to push the buttons on machines (from cell phones to elevators to blenders).

And, while sometimes parents confess to me that they “hide” foods in smoothies (e.g. kale, spinach), it’s not “hiding” when your kids are the ones putting the ingredients in the blender! They’re simply helping make a tasty dish that includes healthy ingredients!

Do you involve your kids in making smoothies? What are your favourite smoothie combinations? I'd love to hear from you (comment below)!

Get Stocked! Keep Your Kitchen Ready for Action

pantry_medmed March is Nutrition Month!

This month I've hand-picked to share with you two tips from national Nutrition Month.

I chose this Nutrition Month tip because it really is a key way to make meals happen for your family. You don't need a fancy kitchen to make meals happen. But having it well-stocked really does help.

Yes, the photo is of my shelves. What do I keep on-hand?

  • Lots of herbs and spices to make a wide veriety of dishes from simple, basic ingredients.
  • I eat a lot of beans - both from dry and canned.
  • Grains like quinoa, rice (brown, white, aborio, wild), oats, buckwheat groats, pasta, and polenta (both cornmeal that I make from scratch and the pre-made rolls).
  • Stir-fry ingredients like coconut milk
  • Basics for many recipes like canned tomatoes, several vinegars and vegetable oils
  • Quick snacks like popping corn, almonds (in the fridge), and cocoa nibs
  • Baking ingredients like canned pumpkin, cocoa powder, flour, sugar, vanilla, baking soda, baking powder, cornstarch.


Nutrition Month Tip #10: Get Stocked! Keep Your Kitchen Ready for Action

It’s easier to cook when you have basic ingredients in your kitchen. Keep staple foods on hand, such as:

  • Fresh and frozen vegetables and fruit
  • Whole grains, such as quinoa, oats, brown rice andbarley
  • Milk, cheese and yogurt
  • Eggs
  • Canned salmon and chunk light tuna
  • Canned or dried legumes, such as chickpeas, blackbeans and lentils
  • Spices, garlic, vinegars and oils

​With a well-stocked pantry, fridge and freezer, you’ll be ready to cook quick meals.

For more information: http://www.dietitians.ca/Your-Health/Plan-Shop-Cook/Shop-Smart.aspx