Healthy Kids Snack - Banana Roll Ups

healthy kids snack banana roll ups

Sometimes the classics are a classic for a reason. Bananas and peanut butter simply taste great together. Here's a fun way to bring this classic duo together in a healthy kids snack. I'm choosing to share it today because it's easy for young hands to manage. Perfect if you're gearing up to pack snacks or a lunch for little ones with back-to-school next week. This works well with peanut butter, other nut butters (e.g. almond butter) and the non-nut butters if your child attends a nut-free facility.

Hey, it's also a delicious idea for those of us who are young at heart :)

Banana Roll-Ups Ingredients 2 small tortilla wraps, whole wheat ¾ medium banana 1 tbsp natural peanut butter, nut butter or non-nut butter ½ tsp honey (optional) 1 dash cinnamon, ground

Banana Roll-Ups Directions

  1. Slice banana.
  2. Spread nut butter or non-nut butter on wraps.
  3. Top with bananas.
  4. Drizzle honey and add a dash of cinnamon.
  5. Roll (pack in lunch boxes) and enjoy.

Get more healthy, simple, kid-friendly recipes.

Nutrition Game Changer: Cook The Night Before

cook-the-night-before

Last month I introduced the concept of nutrition game changers. Nutrition game changers are foods or simple habits that can make a big impact in your health. Some might use the term ‘nutrition hacks’. Today, I had planned to share with you a different habit. But I noticed that, with the nights cooling off again, I’ve been using this habit again. I do it a lot myself. And, it’s helped a number of clients too. I realized that this one simple habit can have a big impact on your health because it makes it easy to eat a lot of healthy foods that you might not otherwise eat. So, what’s this simple habit? Cook the night before.

Cook the Night Before

It’s a nutrition game changer for two huge reasons:

  1. It lessens the stress of getting dinner on the table.
  2. It makes it possible to eat healthy foods like whole grains, beans cooked from scratch, and longer-cooking veggies.

I’ve heard it called the witching hour. You know, that window of time between finishing work, commuting through traffic, picking the kids up from daycare, and making (and eating) dinner. For many people, it’s the most stressful time of the day. No one I know has an hour (or more) to cook dinner. Most people have somewhere from 20 – 30 minutes. Our modern lives have squished this time so much that it’s no wonder that take-out, drive-throughs, and pre-prepared food sales are through the roof. They’re survival techniques. You always ask me for help to get from survival to thriving. Cooking the night before can be a huge help.

No, I’m not talking about spending hours in the kitchen in the middle of the night! I’m talking about multi-tasking. You are likely home for several hours in the evening, after dinner but before you go to bed. Use this time to cook.

There are lots of healthy foods that take almost no work, but they take a long time to cook. Take a few minutes for prep, get the food cooking, set a timer, and then set off with your other evening activities. I personally do the prep while I’m already in the kitchen cooking my dinner for this evening. I don’t have kids so that works. If doing anything else besides preparing tonight’s dinner will take you over the edge, then do the prep later.

When the food is cooked, simply allow them to cool at room temperature and then store them in the fridge. They’ll store for several days in the fridge. On the day that you want to eat them for dinner, simply re-heat them in the microwave or steam them. (Place at least 1 inch of water in the bottom of a double boiler. Bring to a boil over high heat. Place your food in a bowl inside the double boiler. Steam until heated).

What Healthy Foods Can You Cook the Night Before?

  • Whole grains. E.g. pot barley, brown rice, wild rice, farro. They all take 45 – 60 minutes to cook. But the prep is easy. Just add them to a pot with water, bring to a boil, reduce the heat to simmer, set your timer and you’re done.
  • Winter squash. E.g. spaghetti squash, butternut, acorn squash. Preheat the oven to 425 degrees F. For all but spaghetti, cut the squash in half lengthways, scoop out the seeds. Pour a splash of water in the seed cavity. Place in a baking dish. Cover with tin foil. Bake for 45min-1 hour (until the flesh is soft when you test it with a fork). For spaghetti squash: leave the squash whole, pierce all over with a fork. Cover with tin foil. Bake for 1 hour or longer (until the squash gives easily to your touch).
  • Root veggies. E.g. beets, yams. There are lots of ways to bake these veggies. Techniques vary by veggie. But unless you take a long time to prep them by cutting them into small pieces, they’re going to take 45min – 1 hour to bake. Here’s one minimal prep time technique each for beets and yams: Preheat the oven to 425 degrees F. Wash but don’t peel the beets. Remove any stems or skinny roots. Rub with olive oil. Wrap in tin foil and place in a baking dish. Roast until soft to the touch. The time will vary based on the size of your beets. Yams can be cooked at the same temperature. Wash but don’t peel the yams. Pierce all over with a fork. Wrap in tin foil. Bake for 45min- 1 hour.
  • Dried beans. Cooking beans from dry is not only cheaper, but it avoids the exposure to BPA in the liner of most cans. Beans take 2 simple prep steps – one the morning before and one the night before. In the morning, measure out your beans, place in a bowl, cover with water (at least 1 inch above the beans), and sit at room temperature all day. At night, drain the beans,  place them in a large pot, add fresh water to cover at least 1 inch above the beans, bring to a boil, reduce the heat to simmer, set your timer and you’re done.

Extra Tip: All of these foods make fantastic whole-meal salad ingredients. Cook extra the night before and enjoy them both (cold) as a whole meal salad for your lunch and warm as a part of dinner.

Looking for new recipe ideas? Find lots of great healthy recipes here.

3 Ways to use Farmers’ Markets to Get Your Child to Eat Veggies

3 Ways to use Farmers’ Markets to Get Your Child to Eat Veggies

It’s the height of summer and farmers' markets are approaching their peak. Perhaps you already shop at your local farmers’ market. Or, you’ve been meaning to check out the one in your neighbourhood. I’ve been a big fan of farmers’ markets since before the locavore movement made it cool. I have fond childhood memories of waking up early, piling into the car, and driving out of the city to the big farmers’ market in the country. Shopping at farmers’ markets supports your local economy, builds food security, and promotes community. Farmers’ markets are also a fantastic opportunity to get your kids excited about vegetables – from toddlers to pre-teens. Here are 3 fantastic activities to harness the opportunity at the farmers’ market to maximize your picky eaters’ enthusiasm for veggies and fruit.

  1. Helping Hands. Let your little one pick your produce. For example, tell her that you need 10 potatoes (or 1 head of lettuce, or 5 pears, etc). Then, let her pick and bag the 10 potatoes. Encourage “help” from the vendor – ask him questions like “How do you pick the best potatoes?” or “How do you know that a watermelon is ripe?” This is a great way to engage the pickiest eaters because it doesn’t even involve tasting the food. However it gently gets them to explore and feel ownership for the veggies/fruit. Both of which help them move towards trying it.
  2. Different Varieties, Same Food. Another gentle way to help kids be open to trying new foods is to have a taste testing of different varieties of the same food. Choose a food that your child already eats. Then choose other colours and shapes of the same food from the farmers’ market. Prepare all the varieties and try them all, comparing them. Take cucumbers for example: pick up one each of field cucumber, lemon cucumber, long English cucumber, pickling cucumber, and any other variety that you can find. When you get home, cut slices of each variety and lay them out on a plate. Gather your family. Try each one. Describe all your senses – how do they look, smell, taste? Is one sweeter, one more sour, one have a thicker skin?
  3. Kids’ Choice. Let your child choose any one vegetable or fruit at the market. Let kids pick themselves, or have them talk with the vendors to get recommendations such as “what’s especially yummy today?” or “My favourite vegetable is broccoli and I don’t like radishes, what would you recommend that I try?” Prepare your child’s choice together later that day. Older kids can help research and choose recipes. This will inspire pride and ownership of this food which helps many kids be open to taste it. You may want to set a budget ahead of time – otherwise your child may choose the giant, $30 hubbard squash, LOL!

One final (and important) note: It’s all in the attitude. Yours. Do these activities with your kids in the spirit of fun and exploring. Not in the spirit of forcing. Their enthusiasm will soar. And, with their new-found enthusiasm, they may feel brave enough to try the veggies (and perhaps even like them).

Banana Ice Cream (Dairy and Sugar Free)

banana ice cream

I wish that I had discovered this recipe earlier in my life. It’s creamy, smooth and delicious – just like ice cream! Banana ice cream.

While it’s vegan and sugar-free, the best thing about this recipe (besides the taste) is that it only includes 1 or 2 ingredients. How great is that!

The secret is very ripe bananas. Buy them when you see them in the store. Slice and freeze them. Then you’re ready to make ice cream anytime you wish.

Blending the bananas does take a little while. At first they will break into a chunky slurry and you will likely think that this “ice cream” idea doesn’t work. Be patient. Next it will form one big ball. Then, suddenly, it will become a beautiful, smooth, whipped texture – just like ice cream. If you haven’t added any strongly coloured flavourings, the colour of your bananas will also suddenly lighten considerably to a creamy off-white. That’s what you’re looking for – your “ice cream” is ready!

There are likely hundreds of flavor combinations. I’m sharing the plain version (so you know the base recipe) along with 3 flavour ideas. My favourite is the cinnamon.

Banana Ice Cream Directions

  1. Peel and slice bananas. Freeze.
  2. Place frozen sliced bananas in a blender. Add flavouring ingredients. Blend until smooth.

Banana Ice Cream Ingredients

Plain

1 cup              sliced bananas

Cinnamon

1 cup              sliced bananas

¼ tsp              cinnamon

Chocolate

1 cup              sliced bananas

½ - 1 tsp        cocoa

Half a teaspoon of cocoa results in a banana ice cream with just a hint of chocolate. One teaspoon gives a full chocolate flavour. Choose a level that you enjoy.

Strawberry

2/3 cup          sliced bananas

1/3 cup          strawberries

This combination works best if you partially blend the bananas first until they are just about to start creaming. Then add the strawberries. The result will be a creamy ice cream with strawberry flavour. Adding the strawberries at the same time as the bananas results in a more icy rather than creamy texture (more sorbet-like rather than ice cream-like).

Check out more healthy recipes.

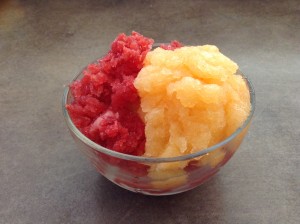
Fresh Fruit Granitas

Fresh Fruit Granitas

Similar to a slushie but made with real fruit, granitas are super refreshing in the summer heat.

They’re easy to prepare. The only tricky thing is to plan ahead so that you’re home and you remember to break up the ice crystals every hour (I set the alarm on my phone to remind me).

Kids can help measure ingredients, push the buttons on the blender, and scrape the ice crystals.

The fruit flavor is strong in granitas. The recipes here are listed from the most mild to the strongest. If your little ones prefer mild flavours, stick to the melon granitas. The kiwi granita is so strong that it almost made my eyes water (which I enjoyed on a hot afternoon).

Fresh Fruit Granitas - Directions

The steps are the same for all the recipes:

  1. In a saucepan, combine sugar and water.
  2. Bring sugar water to a boil until the sugar is well dissolved.
  3. Remove from the heat and let cool for 10 minutes.
  4. In a blender, combine the fruit (removed from it’s peel and pits), fruit juice (or other liquid), and sugar water.
  5. Pour into a non-metal baking dish, such as a glass lasagna pan.
  6. Place in the freezer. Freeze for 1 hour.
  7. Remove from the freezer and scrape thoroughly with a fork, breaking up the ice crystals.
  8. Return to the freezer for 1 hour. Again, remove from the freezer and break up the ice crystals with a fork. Repeat at least 2 more times.

Fresh Fruit Granitas - Recipes

Cantaloupe

Adapted from: http://www.whiskaffair.com/2013/03/cantaloupe-lemon-and-mint-granita.html

1                      cantaloupe

1/4 cup          sugar

¼ cup             water

4 TBSP            fresh lemon juice

Raspberry-Watermelon

Adapted from: http://whipperberry.com/2013/06/raspberry-watermelon-granita.html

5 cups             cubed, de-seeded watermelon

2.5 cups          raspberries

½ cup             sugar

½ cup             cran-raspberry juice cocktail

(Combine sugar and cran-raspberry juice cocktail in saucepan.)

Pineapple-Mango

Adapted from: http://www.muybuenocookbook.com/2013/03/pineapple-and-mango-granita-blendtec-giveaway/

Juice from 2 limes

1/3 cup          sugar

1                      pineapple, peeled, cored and diced

2                      mangos, peeled, pitted, and diced

(There’s no heating the sugar in this recipe. Simply combine all ingredients in a blender.)

Kiwi

Adapted from: http://dhaleb.com/2010/03/

5                    kiwis

½ cup           sugar

½ cup           water

1 cup              club soda

2 teaspoons   lime juice

See more delicious, healthy recipes here.

4th Annual Home-made Popsicles (a.k.a. Ice Pops, Paletas)

Home-made popsicles, healthy, no sugar

I love that the healthy home-made popsicles trend is continuing (also known as ice-pops or paletas). Have you jumped on board? It's a fantastic way to enjoy some fruits and veggies. All these recipes are delicious. You won't believe that they have no sugar. Kids often love to help make them too. Here are 4 new home-made ice pop recipes for you to enjoy this summer. In case you're wondering why there are 4 recipes but only 3 in the picture, I ate all the banana-strawberry-orange ones before taking the photo :)

Home-Made Popsicles Directions

All the steps are the same for all home-made popsicles. And they're very easy:

  1. Combine ingredients in a blender.
  2. Blend until smooth.
  3. Pour into the ice-pop molds.
  4. Freeze.
  5. ENJOY!

Home-Made Popsicles Ingredients

Healthy Creamsicle

This simple 3 ingredient recipe is inspired by one of my childhood favourites – creamsicles. But unlike creamsicles, the only sugar in this recipe is that naturally found in orange juice.

  • 1 cup coconut milk
  • 1 cup orange juice
  • ½ teaspoon vanilla extract

Banana-Strawberry-Orange

Use ripe bananas and in-season, local strawberries and these are naturally sweet – no added sugar is needed.

  • 1 medium banana
  • 10 strawberries
  • ½ cup orange juice

Watermelon-Cucumber-Spinach

Don’t let the deep green colour of this recipe discourage you. It’s my favourite of the 4 recipes here – super refreshing and subtly sweet.

  • 2 cups watermelon, cubed
  • 6 large spinach leaves, thick stems removed
  • 2 inches cucumber, peeled and seeds removed
  • ½ cup coconut water

Pink Grapefruit

This recipe doesn’t need to be blended. Simply juice the grapefruits and combine with the soda water in a pitcher. Pour into the molds and freeze. If you find pink grapefruits too sour, you can substitute freshly squeezed orange juice.

  • 1 cup freshly squeezed pink grapefruits (approx 3 grapefruits)
  • 1 cup soda water

See more healthy, delicious recipes for home-made ice pops.

Baked Avocado Eggs

Baked avocado egg

I'm a long-time lover of avocados and so I'm excited to see that many others have realized how delicious they are. And, that their healthy fat is not something of which to be afraid. Browsing around Pinterest for some cooking inspiration (I love Pinterest), I found this recipe. I like to give credit where credit is due, so here's the original recipe: http://www.popsugar.com/fitness/Baked-Eggs-Avocado-Recipe-30787252 This baked avocado egg recipe has all the creamy deliciousness of an eggs benny - without all the work of Hollandaise sauce. In other words, it's a perfect recipe for Easter breakfast. Finger Food Version: Cook a few minutes longer until both the whites and yolk are set (it's recommended that babies under 12 months don't have runny egg yolks). Cut the egg and avocado into finger-food size pieces. Or, spread on long, skinny pieces of toast.

Baked Avocado Egg Ingredients:

1 avocado

2 eggs

salt & pepper

Optional: toast

Baked Avocado Egg Directions:

  1. Preheat the oven to 425 degrees.
  2. Slice the avocados in half. Remove the pit. Scoop out enough flesh from the avocado,  so the egg will fit in the centre. Reserve this flesh for another recipe/snack.
  3. Slice a small piece off the back of the avocado halves so that they will sit flat without rolling around. Place the avocados in a small baking dish, making sure they fit tightly. If your dish is too big, scrunch up a piece of tin foil to fill the space.
  4. Season the avocado halves with salt and pepper. Crack an egg into each avocado half.
  5. Place in the oven and bake for 15 to 20 minutes. Cooking time will depend on the size of your eggs and avocados. And, how you like our eggs cooked.
  6. Enjoy scooped directly out of the avocados. Or, spread on top of toast.

Check out more healthy, delicious recipes here.