Lunch Box Mango Chutney Chickpea Salad

This plant-based lunchbox is full of flavours that both kids and adults will love. If you’ve got someone who is less than enthusiastic for eating pulses (i.e. beans, lentils, chickpeas) and/or leafy greens, give these recipes a try. They’re fantastic entryway recipes for people who think that they don’t like these nutritious foods.

It can be made both vegan and gluten-free. It’s also peanut-free and nut-free.

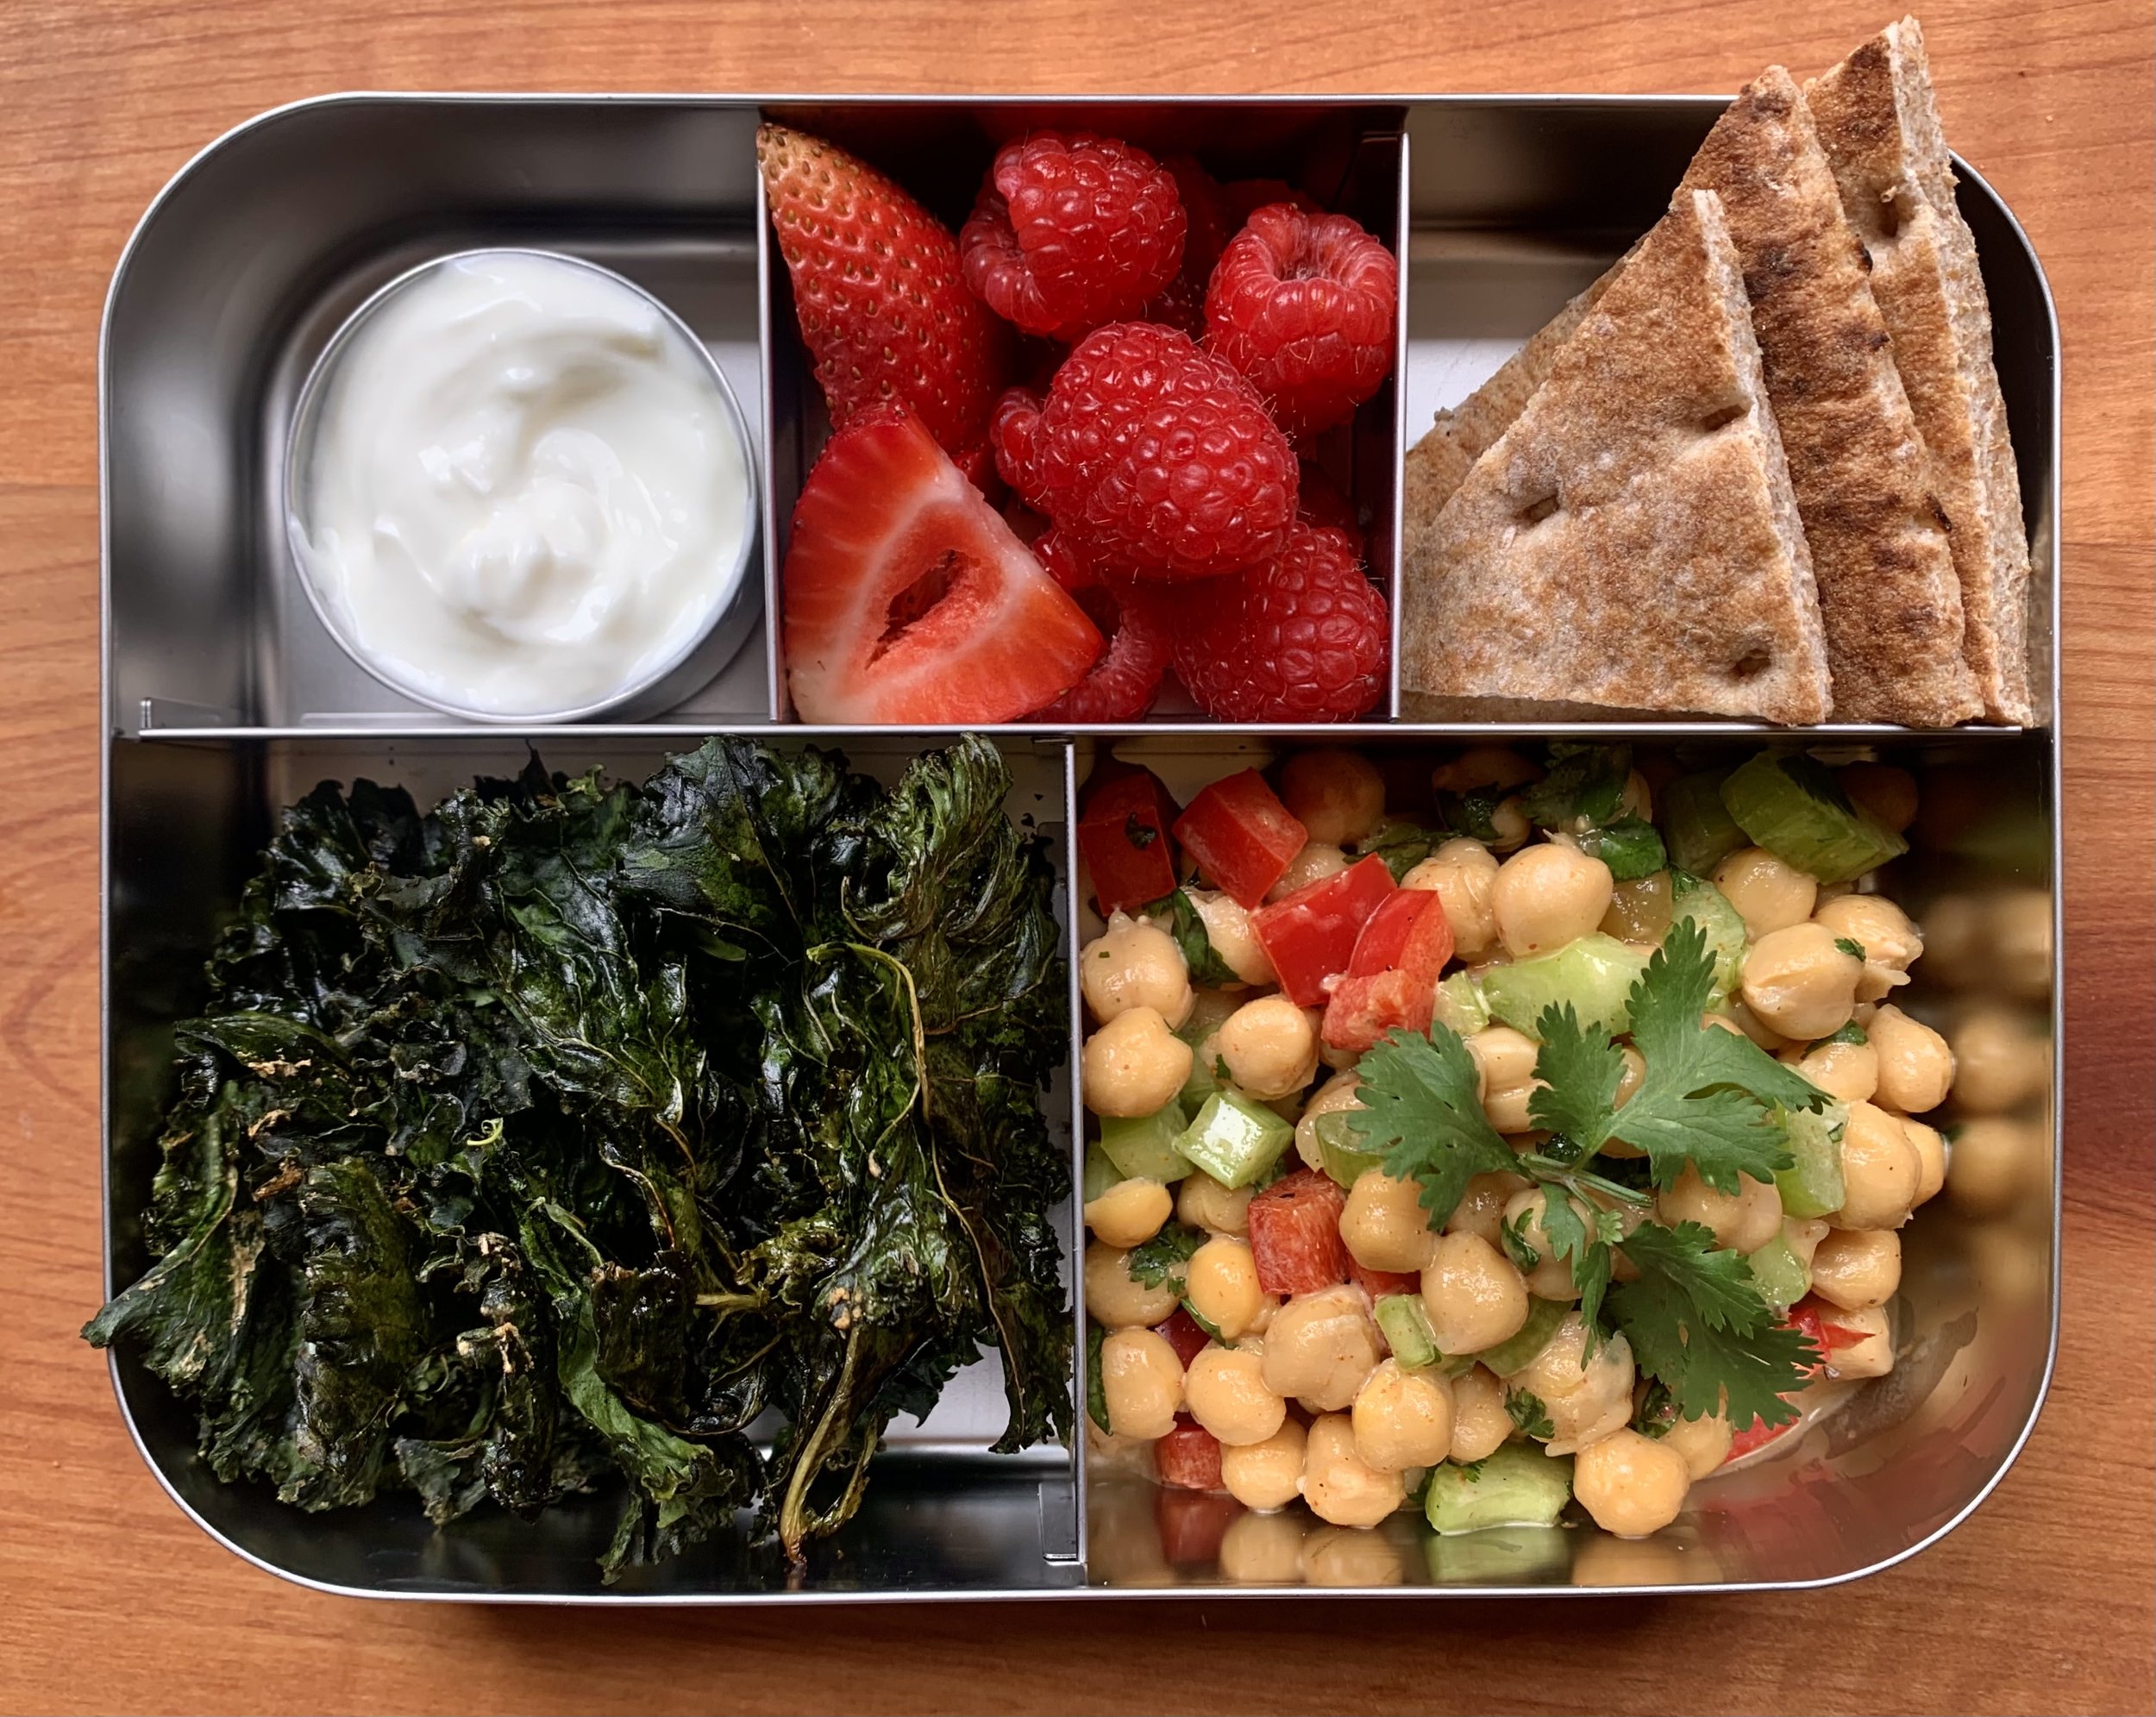
What’s in this lunch box:

  • Mango Chutney Chickpea Salad

  • Whole wheat naan (sub a gluten-free flatbread of your choice)

  • Baked Kale Chips

  • Mixed berries

  • Greek yogurt (for dipping the berries) Sub with a plant-based yogurt alternative for a vegan option.

Kids under 5 years: Mash the chickpeas before serving. Whole chickpeas can be a choking risk.

Enjoy!

Mango Chutney Chickpea Salad

A delicious alternative way to enjoy this recipe is to mash the chickpeas for a more chicken-salad or tuna-salad type experience. It also reduces the choking risk for kids under 5 years.

Mango Chutney Chickpea Salad Ingredients

¼ cup chopped celery

¼ cup chopped red bell pepper

¼ cup cilantro

1 can chickpeas (14-16 ounces)

2 tbsp mango chutney

1 tbsp mayonnaise/vegan mayo

1 tsp curry powder

Salt and pepper to taste

 Mango Chutney Chickpea Salad Directions

  1. Drain and rinse the chickpeas.

  2. Optional: In a large bowl: Mash the chickpeas.

  3. Combine all the ingredients in a large bowl. Stir to combine.

  4. Optional: Garnish with extra cilantro for presentation.

  5. Enjoy!

Baked Kale Chips Ingredients

1 bunch of kale

1 tbsp olive oil

1 tsp garlic powder

Salt and pepper to taste

Baked Kale Chips Directions

  1. Preheat oven to 325 degrees F.

  2. Wash kale and allow it to dry completely (we don’t want steamed kale).

  3. Massage the olive oil into the kale with your hands. Season with garlic powder, salt & pepper.

  4. Spread the kale out on a cookie sheet and bake for 20-25 mins (until crispy). Watch closely the last 18-25 minutes as the kale goes from crispy to burnt very quickly.

  5. Enjoy!

For another amazing Lunch Box recipe, check out: Black Bean Burrito with Pico De Gallo and Banana Chocolate Cookies

Photo and recipe credit: Olivia Dodsworth

5th Annual Homemade Ice Pop Recipes

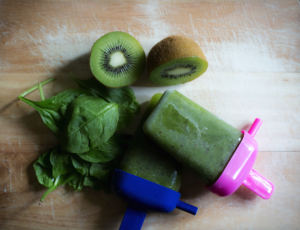
spinach-kiwi ice pop

It's back, my annual home-made ice pop recipe collection. Some may call these homemade popsicles or paletas. Or, frozen smoothies. Whatever you call them they're a delicious summer treat. I want to give a big shout out to Carla, the dietetic student who is volunteering with me for creating these recipes. My directions for her: the recipes need to be simple, include no added sugar, include fruit and even veggies, and only include easy-to-find ingredients. Oh, and of course, that they needed to be delicious. She sure delivered.

The directions for each recipe are the same:

  1. Combine all ingredients in a blender.
  2. Blend until smooth.
  3. Pour into molds.
  4. Freeze.

Enjoy her work!

Kristen

P.S. For more delicious, healthy frozen recipes, check out these links:

Spinach Kiwi

Inspired by: http://www.kiipfit.com/spinach-kiwi-popsicles/

Packed with fruit and leafy greens, the vibrant green color of these popsicles comes from blending both kiwi and spinach.

  • 1/3 cup spinach
  • 1  kiwi
  • 2 drops lemon juice
  • 1/3 cup water

Mango Lassi

mango lassi ice pop

Inspired by: http://revisfoodography.com/2015/04/mango-lassi/

Inspired from a classic Indian cold drink, mango lassi is a blend of yogurt, fruit and spice. Not a fan of cardamom? Simply omit the spice and you can still enjoy it as a mango-yogurt blend.

  • 1 mango
  • 160 ml greek yogurt
  • 1 small pinch cardamom (to taste)

Cantaloupe

cantaloupe ice pop

This very simple and refreshing recipe allows you to use ripe or extra ripe cantaloupes. No added sugar necessary.

  • ¾ cup cantaloupe
  • ¼ cup water

Get more healthy home-made ice pop recipes here:

5th Annual Healthy Home-Made Popsicles (ice pops, paletas)

4th Annual Healthy Home-Made Popsicles (ice pops, paletas)

2 Favourite, Filling Salads

Full-meal salads are my absolute go-to during the summer months. And, with the growing trend of salads-in-a-jar, I can see that others are catching on. The secret to a perfectly balanced, full-meal salad (that will actually fill you up) is to include whole grains, protein, and healthy fats along with all those veggies. I also like to include a sweet note (such as fresh or dried fruit) and something crunchy for texture. Often foods will do double duty, such as chopped nuts providing protein, healthy fat, and crunch.

Baby- and Kid-Friendly Version: Serve each salad component “deconstructed”, in it’s own little pile. Serve a small dish (ramekin) of the dressing on the side. Or, do a make-your-own salad bar with the ingredients. There is no extra work for baby-friendly, finger-foods – just place pieces on your baby’s tray.

Enjoy!

Protein Food Ideas:

  • Beans and lentils, canned or cooked from dry
  • Edamame
  • Tofu cut into cubes or fingers
  • Grated or cubed cheese
  • Leftover meat and poultry, e.g. shredded chicken, sliced steak
  • Chopped or slivered nuts
  • Seeds, e.g. pumpkin seeds, hemp hearts
  • Hard boiled eggs

Whole Grain Ideas (Starch Foods):

  • Cooked and cooled pasta
  • Buckwheat (soba) noodles
  • Brown rice
  • Wild rice
  • Quinoa
  • Farro
  • Pot barley
  • Cooked and cubed sweet potatoes

For inspiration, here are two of my favourite full-meal salads. You’ll notice that there aren’t amounts listed for the salad ingredients – make as much or as little as you want.

Black Bean Salad

black bean salad_medmed

Ingredients

Brown rice

Black beans

Bell pepper (red, yellow, or orange)

Corn (cooked from frozen or cut off the cob)

Avocado

Dressing

1 TBSP            Vegetable oil (I particularly like avocado oil)

1 TBSP            White wine vinegar

2 TBSP            Lime juice

1/4 tsp           Ground cumin

1/8 tsp           Cayenne pepper (optional)

Pinch              Salt

Lentil-Farro Salad

lentil farro salad_medmed

Ingredients

Farro, cooked and cooled

Green lentils*, cooked and cooled

Grated carrot

Grated beet

Kale, cut into thin ribbons and massaged with a dash of oil, vinegar and salt

Slivered almonds

Raisins

Dressing

1 TBSP            Good, extra virgin olive oil

3 TBSP            Balsamic vinegar

Fresh cracked pepper

Pinch              Salt

* Do you have difficulty digesting beans? Give lentils a try, they’re less “musical”, and check out my tips for making beans and lentils less gassy.

Carrot Salad

carrot salad

Sometimes we need to be reminded of the classics. Carrot salad is perfect for this time of year - when we're tired of eating Winter fare but we're still waiting for Spring and Summer's local bounty.

Naturally sweet, this is a salad that many non-salad eating picky kids will actually eat.

It's also a very forgiving recipe - make more or less salad as you wish. Reduce the honey if you find it too sweet, or reduce the amount of dressing if you prefer your salads lightly dressed. Enjoy!

Carrot Salad Ingredients

3 cup grated carrot

1 cup raisin, seedless (sultana)

1 tbsp honey (wait to offer babies honey until after 12 months)

6 tbsp mayonnaise (plain yogurt works well too)

1 tsp lemon juice (fresh is best)

1/4 tsp salt

1/4 cup milk

Carrot Salad Directions

  1. In a large bowl, combine grated carrots and raisins, tossing lightly.
  2. In a separate bowl, stir together remaining ingredients.
  3. Pour mixture over carrots and raisins. Stir carefully until well combined.
  4. Chill thoroughly before serving.
  5. Enjoy!

Deconstructed Version (for kids who don't like their foods to touch) :

  • Set aside some grated raw carrot and raisins. Serve in their own small piles on the plate.
  • Set aside a small amount of the dressing in a small dish.

Get more healthy, easy, tasty recipes here.

Nutrition Game Changer: Fibre

fibre nutrition hack detox stop craving

Fibre. It’s not exactly the sexiest topic. But it actually is a NGC* if you want to love your body. Which really is sexy, isn’t it? It’s recommended that adults eat 25 – 38 grams of fibre each day. But most Canadians don’t get nearly enough (usually only half the recommendation). Here’s why you will want to get enough and what foods to find it in. And, a couple of words of warning when it comes to increasing your intake.

Why You Want Fibre:

There are two main reasons why it's is a NGC: 1) steady blood sugar; 2) large, regular bowel movements.

Fibre helps to lower blood cholesterol and keep blood sugar levels steady. Yes, these both help prevent and manage heart health and diabetes. But there’s also a more immediate reason why you want this. Steady blood sugar means consistent energy levels. No more roller coasters of highs, followed by crashing lows. This means no “hangry” feelings and less cravings for junk food. It means that fibre fills you up and helps you stay feeling full for longer.

Fibre also helps keep your bowels regular and may protect against colon cancer. It binds bile secreted by your liver. Large, easy to pass, bowl movements remove toxins and waste from your body. You don’t want tiny little pellets. In other words, yes, it's the original “detox”. We’re learning more about the role of having a healthy microflora in our digestive tracts. Fibre is considered a “pre-biotic” in that it creates an environment that supports the healthy bacteria.

Words of Warning:

I have two important words of warning when it comes to increasing the amount you eat:

  1. Drink lots of water! Lots of fibre without fluids will have the opposite effect of what you want (namely: constipation). I recommend that we women drink 2.5 Litres of non-sugary fluids each day. Men: drink 3.5 Litres of non-sugary fluids each day.
  2. Increase your intake slowly. Think of fibre like exercise for your digestive tract. If you’ve been eating highly processed foods with little fibre, your digestive tract has been a couch potato. Increase your fibre slowly and steadily. Think of it like an exercise training regimen. Going too fast too soon will result in constipation.

Foods to Eat:

A good general rule is that foods that need lots of chewing contain lots of fibre. The first step in digesting fibre is a thorough chewing (see warning #2 above). If you don’t have to do much chewing of a food, it’s a sign that the fibre has been removed by machines (i.e. processing). Of course there are exceptions to this, but it’s a good general rule when looking for fibre-rich foods.

Great sources of fibre are:

  • Vegetable and fruit. Eat 7 servings a day. As often as possible, eat the peels of your veggies and fruit – there’s lots of fibre in those peels. Juice, including fresh press juice, doesn’t have the same fibre as eating the whole vegetable/ fruit.
  • Pulses: beans, lentils, and peas.
  • Nuts and seeds.
  • Intact whole grains. Examples include brown rice, wild rice, quinoa, steel cut oats, and pot barley. Look for breads that are heavy when you lift the loaf and need lots of chewing. Light, fluffy “whole wheat” bread really isn’t an intact whole grain. There are lots of bakeries and brands out there making bread from intact whole grains. One brand that’s widely available is Silver Hills.

The best way to get fibre is to eat foods closest to the way nature made them. Be wary of “high fibre” or “fibre added” foods that are highly processed (e.g. many “healthy” bars, some yogurt) because it hasn’t been scientifically proven that adding fibre to highly refined foods has the same results in our bodies as eating the fibre that was present when mother nature made the food.

*A Nutrition Game Changer (NGC) is a food or habit that has made a big impact on the nutritional health of clients I’ve worked with. And, in my life too. Some may call these nutrition hacks. But I'm not a fan of that phrase. I share one NGC each month.

Curious about how I can help you achieve your health and nutrition goals? Schedule a (free) call to find out.

Squash Soup with Orange and Ginger

squash-soup-carrot-orange-ginger

This squash soup, with its bright orange colour and warming ginger is my “chicken” soup that I eat when I have a cold or the flu. Or when I’m looking for comfort food to warm me on a cold day.

This is a “Kristen” recipe – very imprecise but also very flexible. It takes some time with all the chopping. I recommend making a big batch because it freezes well.

Squash Soup Ingredients

  • Vegetable oil (preferably olive oil)
  • Member of the allium family (onion, garlic, leek, shallots)
  • Ginger (I like about an inch)
  • 2 or 3 kinds of orange vegetables like winter squash (my favourite is butternut but any kind will work including pumpkin), carrots, yams, sweet potatoes
  • Vegetable stock, chicken stock or water (water will make the blandest soup – use as a last resort)
  • Orange juice
  • Salt or seaweed
  • Fresh ground pepper

Squash Soup Directions

  1. Finely chop the members of the allium family.
  2. Grate the ginger.
  3. Peel and chop the orange veggies. Cut squash, yams, and sweet potatoes into ½ to 1 inch pieces. Cut the carrots into coins. Carrots take longer to cook than squash and yams/ sweet potatoes are in the middle. So, you will want the carrot pieces smaller than the squash pieces and the yam/ sweet potato pieces middle in size.
  4. In a large, heavy bottomed pot, add enough oil to cover the bottom of the pot. Heat it over low-medium heat. Add the allium family members and cook until onions/ shallots are translucent or the leeks have softened.
  5. Add the ginger and orange vegetables and sauté for a few minutes, stirring frequently.
  6. Add enough stock to just cover the veggies. Add seaweed or salt. Cover with a lid, turn up the heat to high and bring to a boil. Reduce heat to medium-high and boil gently until the orange veggies are soft, stirring periodically. Add stock/ water while cooking, if needed.
  7. Remove from the heat and let cool slightly.
  8. Using a blender or hand-held mixer, puree the soup, adding orange juice one splash at a time until you reach your desired consistency and flavour.
  9. Return to the pot and re-heat. Serve hot, topped with a sprinkling of freshly ground pepper.
  10. Enjoy!

Find more delicious recipes here.

Beets: What to Do With Them

beets what to do

These versatile root veggies are one of my favourites! A classic storage, root veggie, you can find local ones throughout the winter. Beets have been making headlines lately because they may help boost exercise performance. Many kids like them because of their naturally sweet taste. However, people often wonder what the heck to do with them. So I’m sharing a couple of my favourite ways to use beets.  

Grated – Raw Beets

Beets don’t even need to be cooked. Simply wash them, peel off the outer skin, and grate them into a salad.

It doesn’t get any easier than that!

Roasted Beets

When I’m turning on the oven to cook something, I often pop a few beets in at the same time – either for a warm side-dish today, or for chilled as a salad in the future.

  1. Wash beets and cut off any long tails or furry top bits.
  2. Cut a piece of tin foil large enough to wrap the beet in. Lay it on the counter, shiny side up. Pour a dollop of olive oil in the centre.
  3. Roll the beet around in the oil to coat it. Wrap the tin foil tightly around the beet.
  4. Repeat for each beet.
  5. Place wrapped beets on a cookie tray or in a baking dish.
  6. Roast until tender, how long this takes depends on the size of the beets and the heat of your oven – at 350 degrees F it may take as long as 2 hours; at 425 degrees F it may take as short as 45 min.

Beet and Bean Borscht

From: Pulses: Cooking with Beans, Peas, Lentils and Chickpeas

This is a fantastic, hearty and tasty, full meal in one pot, vegetarian borscht (perfect for Meatless Mondays). While the recipe takes a little longer to cook, it makes a lot of soup. And, this soup tastes great re-heated. Freeze leftovers (without the yogurt or sour cream topping) in small batches.

Makes 6 Litres

  • 3 tablespoons canola oil
  • 1 large onion, chopped
  • 1 garlic clove, minced
  • 2 carrots, diced
  • 3 celery stalks
  • 3 cups green cabbage, shredded (a Cuisinart or food processor makes shredding quick work)
  • 3 cups beets, peeled and chopped
  • 10 cups vegetable stock (home-made or lower sodium)
  • 4 cups beans such as navy beans or white kidney beans (canned or cooked from dry)
  • ½ cup canned or fresh tomatoes
  • 2 tablespoons lemon juice
  • 1 teaspoon fresh cracked pepper
  • 1 bunch fresh dill (or parsley)
  • plain yogurt or sour cream

Directions

  1. In a big soup pot, sauté onion and garlic in oil until softened.
  2. Add carrots, celery and cabbage and sauté for about 3 minutes.
  3. Add beets and stock and cook for about 1 hour or until beets are slightly tender.
  4. Add beans, tomatoes, lemon juice, pepper and dill. Warm thoroughly.
  5. Serve topped with a dollop of yogurt or sour cream.
  6. Enjoy!

Click here for more healthy recipes.

Healthy Kids Snack - Banana Roll Ups

healthy kids snack banana roll ups

Sometimes the classics are a classic for a reason. Bananas and peanut butter simply taste great together. Here's a fun way to bring this classic duo together in a healthy kids snack. I'm choosing to share it today because it's easy for young hands to manage. Perfect if you're gearing up to pack snacks or a lunch for little ones with back-to-school next week. This works well with peanut butter, other nut butters (e.g. almond butter) and the non-nut butters if your child attends a nut-free facility.

Hey, it's also a delicious idea for those of us who are young at heart :)

Banana Roll-Ups Ingredients 2 small tortilla wraps, whole wheat ¾ medium banana 1 tbsp natural peanut butter, nut butter or non-nut butter ½ tsp honey (optional) 1 dash cinnamon, ground

Banana Roll-Ups Directions

  1. Slice banana.
  2. Spread nut butter or non-nut butter on wraps.
  3. Top with bananas.
  4. Drizzle honey and add a dash of cinnamon.
  5. Roll (pack in lunch boxes) and enjoy.

Get more healthy, simple, kid-friendly recipes.

Nutrition Game Changer: Cook The Night Before

cook-the-night-before

Last month I introduced the concept of nutrition game changers. Nutrition game changers are foods or simple habits that can make a big impact in your health. Some might use the term ‘nutrition hacks’. Today, I had planned to share with you a different habit. But I noticed that, with the nights cooling off again, I’ve been using this habit again. I do it a lot myself. And, it’s helped a number of clients too. I realized that this one simple habit can have a big impact on your health because it makes it easy to eat a lot of healthy foods that you might not otherwise eat. So, what’s this simple habit? Cook the night before.

Cook the Night Before

It’s a nutrition game changer for two huge reasons:

  1. It lessens the stress of getting dinner on the table.
  2. It makes it possible to eat healthy foods like whole grains, beans cooked from scratch, and longer-cooking veggies.

I’ve heard it called the witching hour. You know, that window of time between finishing work, commuting through traffic, picking the kids up from daycare, and making (and eating) dinner. For many people, it’s the most stressful time of the day. No one I know has an hour (or more) to cook dinner. Most people have somewhere from 20 – 30 minutes. Our modern lives have squished this time so much that it’s no wonder that take-out, drive-throughs, and pre-prepared food sales are through the roof. They’re survival techniques. You always ask me for help to get from survival to thriving. Cooking the night before can be a huge help.

No, I’m not talking about spending hours in the kitchen in the middle of the night! I’m talking about multi-tasking. You are likely home for several hours in the evening, after dinner but before you go to bed. Use this time to cook.

There are lots of healthy foods that take almost no work, but they take a long time to cook. Take a few minutes for prep, get the food cooking, set a timer, and then set off with your other evening activities. I personally do the prep while I’m already in the kitchen cooking my dinner for this evening. I don’t have kids so that works. If doing anything else besides preparing tonight’s dinner will take you over the edge, then do the prep later.

When the food is cooked, simply allow them to cool at room temperature and then store them in the fridge. They’ll store for several days in the fridge. On the day that you want to eat them for dinner, simply re-heat them in the microwave or steam them. (Place at least 1 inch of water in the bottom of a double boiler. Bring to a boil over high heat. Place your food in a bowl inside the double boiler. Steam until heated).

What Healthy Foods Can You Cook the Night Before?

  • Whole grains. E.g. pot barley, brown rice, wild rice, farro. They all take 45 – 60 minutes to cook. But the prep is easy. Just add them to a pot with water, bring to a boil, reduce the heat to simmer, set your timer and you’re done.
  • Winter squash. E.g. spaghetti squash, butternut, acorn squash. Preheat the oven to 425 degrees F. For all but spaghetti, cut the squash in half lengthways, scoop out the seeds. Pour a splash of water in the seed cavity. Place in a baking dish. Cover with tin foil. Bake for 45min-1 hour (until the flesh is soft when you test it with a fork). For spaghetti squash: leave the squash whole, pierce all over with a fork. Cover with tin foil. Bake for 1 hour or longer (until the squash gives easily to your touch).
  • Root veggies. E.g. beets, yams. There are lots of ways to bake these veggies. Techniques vary by veggie. But unless you take a long time to prep them by cutting them into small pieces, they’re going to take 45min – 1 hour to bake. Here’s one minimal prep time technique each for beets and yams: Preheat the oven to 425 degrees F. Wash but don’t peel the beets. Remove any stems or skinny roots. Rub with olive oil. Wrap in tin foil and place in a baking dish. Roast until soft to the touch. The time will vary based on the size of your beets. Yams can be cooked at the same temperature. Wash but don’t peel the yams. Pierce all over with a fork. Wrap in tin foil. Bake for 45min- 1 hour.
  • Dried beans. Cooking beans from dry is not only cheaper, but it avoids the exposure to BPA in the liner of most cans. Beans take 2 simple prep steps – one the morning before and one the night before. In the morning, measure out your beans, place in a bowl, cover with water (at least 1 inch above the beans), and sit at room temperature all day. At night, drain the beans,  place them in a large pot, add fresh water to cover at least 1 inch above the beans, bring to a boil, reduce the heat to simmer, set your timer and you’re done.

Extra Tip: All of these foods make fantastic whole-meal salad ingredients. Cook extra the night before and enjoy them both (cold) as a whole meal salad for your lunch and warm as a part of dinner.

Looking for new recipe ideas? Find lots of great healthy recipes here.

3 Ways to use Farmers’ Markets to Get Your Child to Eat Veggies

3 Ways to use Farmers’ Markets to Get Your Child to Eat Veggies

It’s the height of summer and farmers' markets are approaching their peak. Perhaps you already shop at your local farmers’ market. Or, you’ve been meaning to check out the one in your neighbourhood. I’ve been a big fan of farmers’ markets since before the locavore movement made it cool. I have fond childhood memories of waking up early, piling into the car, and driving out of the city to the big farmers’ market in the country. Shopping at farmers’ markets supports your local economy, builds food security, and promotes community. Farmers’ markets are also a fantastic opportunity to get your kids excited about vegetables – from toddlers to pre-teens. Here are 3 fantastic activities to harness the opportunity at the farmers’ market to maximize your picky eaters’ enthusiasm for veggies and fruit.

  1. Helping Hands. Let your little one pick your produce. For example, tell her that you need 10 potatoes (or 1 head of lettuce, or 5 pears, etc). Then, let her pick and bag the 10 potatoes. Encourage “help” from the vendor – ask him questions like “How do you pick the best potatoes?” or “How do you know that a watermelon is ripe?” This is a great way to engage the pickiest eaters because it doesn’t even involve tasting the food. However it gently gets them to explore and feel ownership for the veggies/fruit. Both of which help them move towards trying it.
  2. Different Varieties, Same Food. Another gentle way to help kids be open to trying new foods is to have a taste testing of different varieties of the same food. Choose a food that your child already eats. Then choose other colours and shapes of the same food from the farmers’ market. Prepare all the varieties and try them all, comparing them. Take cucumbers for example: pick up one each of field cucumber, lemon cucumber, long English cucumber, pickling cucumber, and any other variety that you can find. When you get home, cut slices of each variety and lay them out on a plate. Gather your family. Try each one. Describe all your senses – how do they look, smell, taste? Is one sweeter, one more sour, one have a thicker skin?
  3. Kids’ Choice. Let your child choose any one vegetable or fruit at the market. Let kids pick themselves, or have them talk with the vendors to get recommendations such as “what’s especially yummy today?” or “My favourite vegetable is broccoli and I don’t like radishes, what would you recommend that I try?” Prepare your child’s choice together later that day. Older kids can help research and choose recipes. This will inspire pride and ownership of this food which helps many kids be open to taste it. You may want to set a budget ahead of time – otherwise your child may choose the giant, $30 hubbard squash, LOL!

One final (and important) note: It’s all in the attitude. Yours. Do these activities with your kids in the spirit of fun and exploring. Not in the spirit of forcing. Their enthusiasm will soar. And, with their new-found enthusiasm, they may feel brave enough to try the veggies (and perhaps even like them).

Banana Ice Cream (Dairy and Sugar Free)

banana ice cream

I wish that I had discovered this recipe earlier in my life. It’s creamy, smooth and delicious – just like ice cream! Banana ice cream.

While it’s vegan and sugar-free, the best thing about this recipe (besides the taste) is that it only includes 1 or 2 ingredients. How great is that!

The secret is very ripe bananas. Buy them when you see them in the store. Slice and freeze them. Then you’re ready to make ice cream anytime you wish.

Blending the bananas does take a little while. At first they will break into a chunky slurry and you will likely think that this “ice cream” idea doesn’t work. Be patient. Next it will form one big ball. Then, suddenly, it will become a beautiful, smooth, whipped texture – just like ice cream. If you haven’t added any strongly coloured flavourings, the colour of your bananas will also suddenly lighten considerably to a creamy off-white. That’s what you’re looking for – your “ice cream” is ready!

There are likely hundreds of flavor combinations. I’m sharing the plain version (so you know the base recipe) along with 3 flavour ideas. My favourite is the cinnamon.

Banana Ice Cream Directions

  1. Peel and slice bananas. Freeze.
  2. Place frozen sliced bananas in a blender. Add flavouring ingredients. Blend until smooth.

Banana Ice Cream Ingredients

Plain

1 cup              sliced bananas

Cinnamon

1 cup              sliced bananas

¼ tsp              cinnamon

Chocolate

1 cup              sliced bananas

½ - 1 tsp        cocoa

Half a teaspoon of cocoa results in a banana ice cream with just a hint of chocolate. One teaspoon gives a full chocolate flavour. Choose a level that you enjoy.

Strawberry

2/3 cup          sliced bananas

1/3 cup          strawberries

This combination works best if you partially blend the bananas first until they are just about to start creaming. Then add the strawberries. The result will be a creamy ice cream with strawberry flavour. Adding the strawberries at the same time as the bananas results in a more icy rather than creamy texture (more sorbet-like rather than ice cream-like).

Check out more healthy recipes.

Fresh Fruit Granitas

Fresh Fruit Granitas

Similar to a slushie but made with real fruit, granitas are super refreshing in the summer heat.

They’re easy to prepare. The only tricky thing is to plan ahead so that you’re home and you remember to break up the ice crystals every hour (I set the alarm on my phone to remind me).

Kids can help measure ingredients, push the buttons on the blender, and scrape the ice crystals.

The fruit flavor is strong in granitas. The recipes here are listed from the most mild to the strongest. If your little ones prefer mild flavours, stick to the melon granitas. The kiwi granita is so strong that it almost made my eyes water (which I enjoyed on a hot afternoon).

Fresh Fruit Granitas - Directions

The steps are the same for all the recipes:

  1. In a saucepan, combine sugar and water.
  2. Bring sugar water to a boil until the sugar is well dissolved.
  3. Remove from the heat and let cool for 10 minutes.
  4. In a blender, combine the fruit (removed from it’s peel and pits), fruit juice (or other liquid), and sugar water.
  5. Pour into a non-metal baking dish, such as a glass lasagna pan.
  6. Place in the freezer. Freeze for 1 hour.
  7. Remove from the freezer and scrape thoroughly with a fork, breaking up the ice crystals.
  8. Return to the freezer for 1 hour. Again, remove from the freezer and break up the ice crystals with a fork. Repeat at least 2 more times.

Fresh Fruit Granitas - Recipes

Cantaloupe

Adapted from: http://www.whiskaffair.com/2013/03/cantaloupe-lemon-and-mint-granita.html

1                      cantaloupe

1/4 cup          sugar

¼ cup             water

4 TBSP            fresh lemon juice

Raspberry-Watermelon

Adapted from: http://whipperberry.com/2013/06/raspberry-watermelon-granita.html

5 cups             cubed, de-seeded watermelon

2.5 cups          raspberries

½ cup             sugar

½ cup             cran-raspberry juice cocktail

(Combine sugar and cran-raspberry juice cocktail in saucepan.)

Pineapple-Mango

Adapted from: http://www.muybuenocookbook.com/2013/03/pineapple-and-mango-granita-blendtec-giveaway/

Juice from 2 limes

1/3 cup          sugar

1                      pineapple, peeled, cored and diced

2                      mangos, peeled, pitted, and diced

(There’s no heating the sugar in this recipe. Simply combine all ingredients in a blender.)

Kiwi

Adapted from: http://dhaleb.com/2010/03/

5                    kiwis

½ cup           sugar

½ cup           water

1 cup              club soda

2 teaspoons   lime juice

See more delicious, healthy recipes here.

4th Annual Home-made Popsicles (a.k.a. Ice Pops, Paletas)

Home-made popsicles, healthy, no sugar

I love that the healthy home-made popsicles trend is continuing (also known as ice-pops or paletas). Have you jumped on board? It's a fantastic way to enjoy some fruits and veggies. All these recipes are delicious. You won't believe that they have no sugar. Kids often love to help make them too. Here are 4 new home-made ice pop recipes for you to enjoy this summer. In case you're wondering why there are 4 recipes but only 3 in the picture, I ate all the banana-strawberry-orange ones before taking the photo :)

Home-Made Popsicles Directions

All the steps are the same for all home-made popsicles. And they're very easy:

  1. Combine ingredients in a blender.
  2. Blend until smooth.
  3. Pour into the ice-pop molds.
  4. Freeze.
  5. ENJOY!

Home-Made Popsicles Ingredients

Healthy Creamsicle

This simple 3 ingredient recipe is inspired by one of my childhood favourites – creamsicles. But unlike creamsicles, the only sugar in this recipe is that naturally found in orange juice.

  • 1 cup coconut milk
  • 1 cup orange juice
  • ½ teaspoon vanilla extract

Banana-Strawberry-Orange

Use ripe bananas and in-season, local strawberries and these are naturally sweet – no added sugar is needed.

  • 1 medium banana
  • 10 strawberries
  • ½ cup orange juice

Watermelon-Cucumber-Spinach

Don’t let the deep green colour of this recipe discourage you. It’s my favourite of the 4 recipes here – super refreshing and subtly sweet.

  • 2 cups watermelon, cubed
  • 6 large spinach leaves, thick stems removed
  • 2 inches cucumber, peeled and seeds removed
  • ½ cup coconut water

Pink Grapefruit

This recipe doesn’t need to be blended. Simply juice the grapefruits and combine with the soda water in a pitcher. Pour into the molds and freeze. If you find pink grapefruits too sour, you can substitute freshly squeezed orange juice.

  • 1 cup freshly squeezed pink grapefruits (approx 3 grapefruits)
  • 1 cup soda water

See more healthy, delicious recipes for home-made ice pops.

Baked Avocado Eggs

Baked avocado egg

I'm a long-time lover of avocados and so I'm excited to see that many others have realized how delicious they are. And, that their healthy fat is not something of which to be afraid. Browsing around Pinterest for some cooking inspiration (I love Pinterest), I found this recipe. I like to give credit where credit is due, so here's the original recipe: http://www.popsugar.com/fitness/Baked-Eggs-Avocado-Recipe-30787252 This baked avocado egg recipe has all the creamy deliciousness of an eggs benny - without all the work of Hollandaise sauce. In other words, it's a perfect recipe for Easter breakfast. Finger Food Version: Cook a few minutes longer until both the whites and yolk are set (it's recommended that babies under 12 months don't have runny egg yolks). Cut the egg and avocado into finger-food size pieces. Or, spread on long, skinny pieces of toast.

Baked Avocado Egg Ingredients:

1 avocado

2 eggs

salt & pepper

Optional: toast

Baked Avocado Egg Directions:

  1. Preheat the oven to 425 degrees.
  2. Slice the avocados in half. Remove the pit. Scoop out enough flesh from the avocado,  so the egg will fit in the centre. Reserve this flesh for another recipe/snack.
  3. Slice a small piece off the back of the avocado halves so that they will sit flat without rolling around. Place the avocados in a small baking dish, making sure they fit tightly. If your dish is too big, scrunch up a piece of tin foil to fill the space.
  4. Season the avocado halves with salt and pepper. Crack an egg into each avocado half.
  5. Place in the oven and bake for 15 to 20 minutes. Cooking time will depend on the size of your eggs and avocados. And, how you like our eggs cooked.
  6. Enjoy scooped directly out of the avocados. Or, spread on top of toast.

Check out more healthy, delicious recipes here.